Feeds:
Posts
Comments

Archive for May, 2009

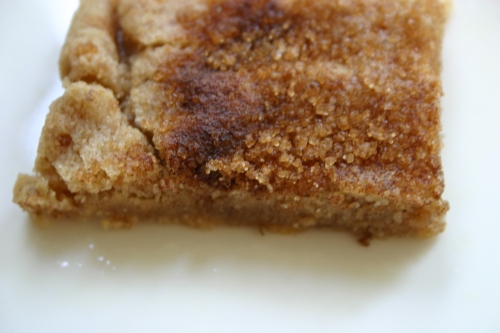
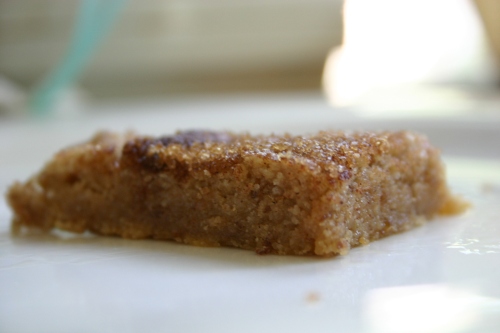
snickerdoodle blondiesWhat do you eat when you can’t choose between snickerdoodles or blondies? Snickerdoodle Blondies, naturally! I adapted/veganized this recipe from Sydney over at The Crepes of Wrath, and it is supremely delicious (and a ton of her other baked goodies look delicious that I want to veganize as well, hello Black & White Cookie!). I could eat this cookie dough-like batter and be perfectly content without even baking these. And baked they are equally delicious – but that could perhaps be due to the fact that I like to remove from the oven just prior to being fully baked, so it sort of has that ‘half-baked/Liz Lovely’ appeal to them. And because I haven’t justified a sweet in a while, let’s do that shall we. Using flax in place of eggs increases the omega-content and eliminates the cholesterol in the treat. Using white whole wheat flour in combination with the all-purpose makes this delicious treat that much more healthy for you. Cinnamon is good for digestion, congestion associated with cold/flu, and has been associated with reducing strees/anxiety. This recipe makes one 9X13 sheet of blondies, about 20-24 bars.

Ingredients:

2 TBSP flax in 4 TBSP warm water
1 C brown sugar
1 C granulated sugar
1 stick Earth Balance Vegan Butter (1/2 C)
a shy 1/4 C canola
1 TBSP vanilla extract
1.5 C all-purpose flour
1 C white whole wheat flour
2 tsp baking powder
1 tsp cinnamon
1/4 tsp ground nutmeg
1 tsp salt
Topping:
2 TBSP granulated sugar
2 tsp cinnamonsnickerdoodle blondies
a pinch nutmeg

Directions:

1. Preheat oven to 350°F. Lightly grease and/or line a 9×13 inch pan. Mix together flax and warm water; set aside.
2. snickerdoodle blondiesIn large mixing bowl, beat together butter and sugars until creamy. Add in the flax mixture and oil, then the vanilla, and beat until smooth.
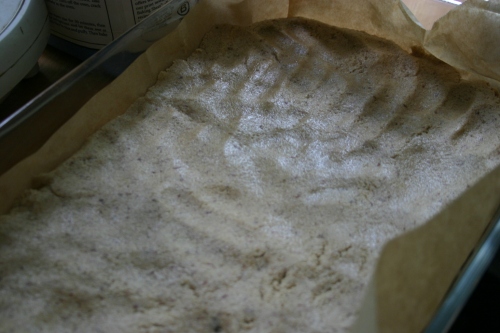
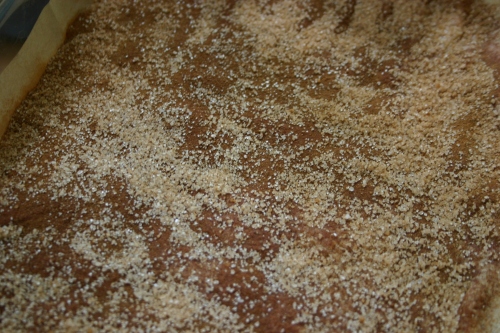
3. Combine the flour, baking powder, cinnamon, nutmeg and salt and set aside. Stir in the flour mixture until well blended. Spread/press evenly in prepared pan (mixture will be somewhat cookiebatter-ish, snickerdoodle blondiesso it’s best to spread it out with a greased spatula or your hands). Combine the granulated sugar, cinnamon, and nutmeg in a little bowl. Evenly sprinkle cinnamon sugar mixture over the top of the batter.
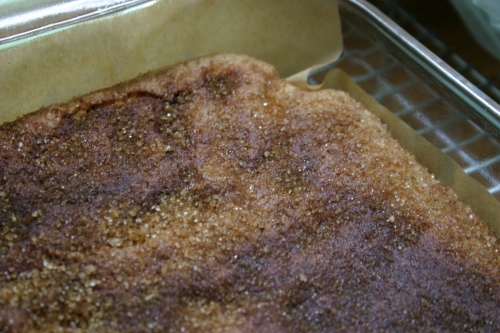
4. Bake 20 minutes (for ‘half-baked‘) to 25 minutes (for fully done) or until surface springs back when gently pressed. Cool before cutting.

snickerdoodle blondies

Happy Baking!

Share

Read Full Post »

My favorite of the Spanish Tapas is the Patatas Bravas, crisp potatoes in a spicy tomato sauce. This recipe is adapted from the Fatfree Vegan Kitchen. I used more oil than what could be considered ‘fatfree’ but for me, a little oil is a good thing. Aside from some minor changes – which I hope Susan at FFVK won’t mind 😉 – I used the recipe as is and it was sublime! So here’s my adapted version. Enjoy!
Ingredients:

3 pounds red potatoes, scrubbed well and cut into 1/2-inch cubes (I didn’t peel mine)
olive oil for brushing potatoes + 1 TBSP for sauté
1/2 medium red onion, minced
2-3 cloves garlic, minced
1 tablespoon smoked Spanish paprika 1/4 teaspoon cayenne pepper
1 15-ounce can diced tomatoes
1 bay leaf
1/2 cup water
chopped cilantro, for garnish

Directions:

1. Preheat to 400°F. Place the potatoes into a large, shallow baking dish that has been lined with parchment and brushed with olive oil. Brush the tops of the potatoes lightly with olive oil and place in the oven. Bake for 20 minutes and then stir with a spatula (if you don’t use parchment, make sure they aren’t sticking to the pan). Bake for about 25 more minutes, stirring again halfway through. The potatoes should become crispy but not hard and overdone.
2. While the potatoes are cooking, make the sauce. Warm the oil over medium heat in a skillet and sauté the onion about 3 minutes. Add the garlic, paprika, and cayenne and cook one minute more. Add the remaining ingredients (except cilantro) and simmer for about 15-20 minutes, until thickened. Remove the bay leaf and puree the sauce using a hand blender or in a regular blender or food processor. Return it to the pan and keep warm until ready to serve.
3. Once the potatoes are cooked, place them in a serving bowl and pour the sauce over the top. Sprinkle with cilantro and serve as a side dish or appetizer.

patatas bravas

Happy Cooking!

Read Full Post »

Orange Cupcakes with Choc GlazeThese cupcakes are the quintessential combination of chocolate and orange. They were adapted from Vegan Cupcakes Take Over The World ‘Orange Pudding Cupcakes’. I attempted the orange pudding, but it was not what I would consider great so we’ll just stick to the parts that were great – the cupcake. This recipe makes about a baker’s dozen, so you’ll have extra to send into the oven as a scout and for batter quality control. 😉

Ingredients:

1/2 C Earth Balance vegan butter, softened (unless you are using a mixer)Endangered Species Supreme Dark Choc
3/4 C granulated sugar
3/4 C hemp or almond milk
1/2 C fresh squeezed orange juice
1 tsp vanilla extract
1 2/3 AP flour
1/3 C white whole wheat flour
1 tsp baking powder
1/2 baking soda
1/4 salt
1 TBSP finely grated orange zest
1 C vegan chocolate chips or finely chopped chocolate of choice, such as a bar of Endangered Species (or for a pooch friendly topping, use carob)

Directions:

1. Preheat oven to 350°F. Brush a muffing tin with canola oil, or line with muffin liners.
2. In a mixing bowl, cream together vegan butter and sugar.
3. Mix together milk, juice, and vanilla. Add to butter/sugar blend.
4. In a separate bowl, sift together flour, baking powder, baking soda, and salt. Add in 3 batches to the butter/liquid mixture. Fold in the orange zest until well combined.
5. Fill each greased/lined muffin cup 2/3 full and bake for 20-22 minutes.
6. Allow to cool for 5 minutes, then remove from pan and allow to cool completely.
7. Drizzle with glaze: In a small saucepan, warm chocolate over medium low heat. Stir to facilitate melting without burning. Fill a pastry bag with the melted chocolate and drizzle across the tops. Alternatively you could dip a fork into the melted chocolate and splatter the chocolate across the tops, but this could prove to be a slightly messier endeavor.Orange Cupcakes with Choc Glaze

Happy Baking!

Read Full Post »

Memorial Day Munchies

cc2Ah, Memorial Day is almost upon us… Another holiday filled with gatherings outside, and by this I mean backyard or beachfront BBQs. So what is a person to do when they know they’ll be confronted with parties filled with vegan-unacceptable foods? Since most BBQs are filled with hamburgers, hotdogs, and other unfortunate foods, it becomes a perfect opportunity to show off your mad skillz in the realm of vegan foods! Here’s a few ideas of what to bring to a party, or to serve at your own! Obviously you don’t need all of this, especially the desserts – but this is just a list of things that can travel well for you to choose from! 🙂

Black Bean Burgers
Grilled New Potatoes with Red Pepper Crust (these are one of Dads personal fav’s)orzo-almond salad5
Orzo-Almond Salad
Frijoles Borrachos
New Potato and Green Bean Salad
Texas Cornbread
Various Salsas: Roasted Corn, Pico de Gallo, Tomatillo
Chocolate Zucchini Cake
Chocolate Chip Cookies
Zesty Lemon Shortbreads
Brownies with Homemade Vanilla Bean or Strawberry Fields Forever Ice Cream

black bean burger and potato wedges

Happy Holidays!

Read Full Post »

Some may say honey-don’t at the thought of melon with peaches, but I say honeydew! This was indeed surprisingly sweet goodness! I couldn’t taste the melon or the peaches explicitly, but the grapefruit tartness was altered to a sweet flavor that for those opposed to the tartness of the fruit would certainly appreciate. I can see this becoming a staple juice in my kitchen – another success from The Big Book of Juices and Smoothies. It’s a 5-star juice for the skin, as well as a 4-star juice for the immune system and for boosting energy. It’s full of beta-carotene, folic acid, vitamins B3 and C, calcium, magnesium, phosphorous, potassium, sodium, and sulfur. This recipe makes about 12 ounces. I drank about 8 or 9 ounces of it, and Mocha thoroughly enjoyed the rest.surprising sweetie smoothie

1 C frozen peaches
1/4 honeydew melon, seeds and skin removed then chopped
1 ruby red grapefruit (ideally from Texas), freshly juiced

Put all ingredients in a blender and blend until smooth. Enjoy!

surprising sweetie smoothie

Happy Blending!

Share

Read Full Post »

Remember, the three key words for any slayer, and in this case detoxer, ‘preparation, preparation, preparation.’ Having a well mapped-out plan will make a detox go much smoother and more enjoyable. The upside, you get to eat as much as you can stand on days 1 and 2. This sounds great, in theory. By the end of day 1, you’ll be sick of the site of vegetables..and by the end of day 2, fruits will be your nemesis. But trust me, you will feel so good and clean come day 4 that’ll you be so happy you forced this minor disruption in your daily life. Planning ahead is a must! You want to be able to let your mind rest, so having a menu planned prior to starting will make things simpler. You want to plan to do this on a 4-day set, where day 3 will fall on a day you can relax and lounge around – no major activities, no stresses. I realize in this fast-paced, active world it’s hard to just take a day to relax. Again, trust me, your body and mind will thank you for a day off. Detoxing is about more than just eliminating toxins from the body; for me it’s also about eliminating toxic thoughts and feelings from yourself as well. Stress, including stressful thoughts and feelings, causes hormonal release that is antithetical to the cleansing process. Detoxing is dependent upon optimal function of the liver. You want to focus on positivity, thus allowing the liver to function to eliminate the toxins that have been stored deep in your cells, instead of fresh stressors and hormones being released during the detox caused by stressful and negative emotions.

Day 1: Veggies day – Raw or mostly raw…only lightly steamed (preferable) or cooked. The idea is to have as minimally cooked food as possible ingested. It’s okay to have an apple or a banana, but try to have only veggies. You’ll be able to have fruit on day 2, all you can stand..and believe me, by the end of the day you won’t want to see a vegetable and you’ll be thankful for fruit day. One would think that as a vegan, an all-veggie day would be easy and delicious. I do have to say, it’s harder than you’d think..so preparation will make it manageable. You must omit traditional vegan staple foods like beans, breads, grains, veggies that take extensive cooking like potatoes, as well as oils that you would normally cook them in. I like to make a big bowl of a raw vegetable medley – like a fruit salad, but with veggies. I like tomatoes, red and yellow bell pepper, baby spinach, fresh green beans, carrots, cucumbers, with some lightly steamed broccoli – but any veg you like raw (zucchini, or that can be steamed in under 5 minutes like the broccoli will be acceptable. I also carry around a bag of baby carrots for a quick and crunchy munchie. You can use spices like garlic, cayenne, etc..but try not to use to much salt, if any. If you need a cuppa, try to keep it caffeine-free, such as a rooibus or herbal tea. Also, try to drink tea that you don’t have to sweeten – or use a natural sweetener like stevia leaves or just a tiny bit of nectar. I don’t really eat a ‘breakfast’ on day 1, just have a cup of peppermint tea…then start in on eating the ‘veggie salad’ once I begin to feel hungry. **If you suffer from hypoglycemia, and are worried about having a crash on day 1, you can include a glass of juice among your beverages.

Day 2: Fruits Only – I find it easiest to make a giant fruit salad and eat on it all day. You can also have smoothies, as long as they are fruit only – no yogurt or other additives that you might normally include (wheatgerm, flaxseed, brewer’s yeast, etc). Again, if you need tea, keep it caffeine-free (rooibus, herbal).

Day 3: Fasting day – When you wake, have a cup of herbal tea and a glass of juice, not smoothie (orange and grapefruit, apple, whatever). Relax, take a nap, stay warm – no heavy activity. In the afternoon, have another cup of herbal tea (chamomile, peppermint, nettle, or sage). In the evening, have a cup of sleepy tea (valerian or chamomile) and another glass of juice. You may experience light headaches and/or light nausea on day 3 – that’s normal (a cup of thyme or peppermint tea will help with that). It’s just the toxins being released into circulation to be eliminated. The more toxins in your body, the worse these symptoms will be. If you eat more processed foods, meat, and/or dairy, or live in a more polluted environment – these things can create a greater storage of toxins in the body. Another thing you’ll notice as the toxins are released is the whitening of your tongue. Again, this is normal.

Day 4: Return to food – Upon waking, have a glass of juice or a smoothie. You want to start light, perhaps some toast or a piece of fruit. Then, for lunch, have something light like tomato or potato and/or butternut soup, even a brothy soup like vegetable noodle. You want to avoid heavy things like beans or sweets. You won’t be able to eat much for the next few days, and when you do eat you’ll notice that you want it to be something good for you. You’ll also notice that your portions will be smaller than normal. You’re going to feel so good, you’ll want to start doing this every spring like I do. You’ll be amazed at how aware you become of the things you eat, and the toxins we put in our bodies on a daily basis – even if you already consider yourself super healthy.

I suppose this goes without saying, but I suppose I should just to be thorough – DRINK TONS OF WATER DURING THE DETOX!

If you are on any medications for various health conditions, please consult a physician before commencing any type of detox or cleanse. This is not a way to lose weight, though you might see some water weight reduction afterwards. Please be smart when embarking on such an endeavor as a cleanse/detoxification.

Happy Detoxing!

Read Full Post »
We’ve discussed growing several garden herbs (see Relaxing With Gnomes category), and the various health aspects associated with them..but what to do when you are overrun with fresh herbs? Here’s where we’ll talk about drying those delicious, fresh herbs you work so hard to grow. For the example photos here, I’ll use lemon balm..but the steps are the same for any herb you have. My lemon balm from last year is already ready for it’s first drying harvest! And we’re barely into May!! My returning oregano is almost ready for a drying harvest, but I’ll give it a few more weeks. I’ve already used oregano in cooking, and made some lemon balm tea – but here I’ll focus on harvests for drying instead of just a sprig or two for cooking..

1. Harvesting: Snip long primary stems just above a nodule (just above a leaf sprout). Continue snipping, but don’t take more than about 30% of the plant, unless you’re harvesting at the end of the season.

lemon balm herb
2. Rinse cut herbs thoroughly. You don’t want any remnants of dirt, unless you like that added flavor in your dishes drying herbs: lemon balmand tea. 😉
3. Tie the ends of all the stems together with twine or string of any kind. All I had was that thin ribbon used for presents, from which you can make those fun curly cues…

4. Hang anywhere that won’t bother you. I have hung them from cabinet knobs or nails in the wall – anywhere you can find. Depending on the herb, drying time varies. Larger leaf herbs, like basil, take longer. Oregano, for me, can dry fully within about 3-5 days. Basil, though I didn’t time it, I let dry for at least a week, maybe 8 days. Like I said, I didn’t check every day.
5. When herbs are thoroughly dry, remove herb leaves from the large/thick stems if you like (such as with basil or rosemary), then crumble or chop them into small bits and store in airtight containers. I use old spice/herb jars that I had previously bought said herb (before growing it). Example: When the dried basil I had bought a while back was empty, I filled it with my freshly dried garden basil.

drying herbs: lemon balmHappy Gardening!

Read Full Post »

It may seem like an odd combo, or even an odd thing to turn into a sorbet..but trust me, this sorbet was as interesting tasting as it is interesting sounding. And by interesting, I mean delicious. If you love green tea, you’ll definitely love this sorbet..and what better way to get those antioxidants when it’s too hot for a steaming cuppa. The ginger gives it a bit of a kick, but not overwhelmingly so. I think you’ll enjoy it. This recipe makes about a pint or so.

Ingredients:

1 C water
1 tsp ground ginger
1/2 C turbinado sugar
1 C double-strength unsweetened green tea, chilled (3 tea bags per 8 oz)green tea-ginger sorbet

Directions:

1. Heat freshly drawn water in a tea kettle, or small saucepan. Pour 1 C hot (just before boiling) water over 3 green tea bags and let steep 3 minutes. Remove tea bags and allow to cool.
2. green tea-ginger sorbetIn a small saucepan, bring 1 C water, ginger, and sugar to a boil over medium heat. Boil until the sugar dissolves, stirring occasionally. Once sugar is dissolved, remove from heat and let cool to room temperature.
3. Mix together ginger syrup and green tea, and chill for 30 minutes.
4. Freeze in an ice cream maker according to manufacturer’s instructions. Transfer to an airtight container and freeze for 20 minutes before serving (otherwise it’ll be super soft).

*Sorbet can be stored in an airtight container for up to 3 days.

green tea-ginger sorbet

Happy Freezing!

Read Full Post »

blood orangesblood lust juiceOkay all you vegans out there..lets awaken the blood lust – for blood oranges, that is! Tap into your inner vampire, and thrive on this juice..It’s chock full of vitamin C, which creates that beautiful and healthy glow – not to mention fight scurvy. And why be immortal if you have bad skin and scurvy? This recipe makes about 8 ounces of wholesome goodness!

Ingredients:

juice of 2 blood oranges
juice of 1 large or 2 medium oranges

Directions:

Juice the oranges and strain into an 8 oz glass. Enjoy immediately!

Happy Juicing!

Read Full Post »

Traditionally, latkes are made with eggs, but I find that garbonzo bean (chickpea) flour works very well at binding the shredded potato together.  Some people eat latkes with apple sauce, but I don’t really see why.  Potatoes deserve ketchup!

Ingredients:

2 large russet potatoeslatkes1

1/2 C garbonzo bean flour

1/4 C water

2 tsp salt

1/4 onion, diced (optional)

canola oil

Instructions:

1.  Preheat a nonstick saute pan to med-high.  In small bowl, mix garbonzo bean flour, salt and water and set aside.

2.  Peel and shred the potatoes.

3.  In large bowl, mix the potatoes with the flour goo.

4.  Add a spoonful of oil to the pan.  Spoon a quarter of the potatoes (or less, if you want smaller latkes) into the pan, forming a patty.  Cook 4 minutes, or until golden brown on the bottom.  Flip, add a touch more oil and repeat.

Serve hot with ketchup.

latkes21

Share/Save/Bookmark//

Read Full Post »

Older Posts »