Feeds:
Posts
Comments

Archive for the ‘Desserts’ Category

unnamed-3While the desired weather of Autumn may still be of an ebb and flow nature here in Houston, the feeling of soups, roasted vegetables, and spiced baked goods is in full effect. It’s a moon day today, so I get the day off from my Ashtanga yoga practice, my teaching practice, and as much of my work as possible. On moon days, I like to visit with the sprouting fall veggies in the garden, snuggle with Marley, and bake.

On this moon day, I present to you Pumpkin-Stout Muffins. You can also make this in a 9-inch loaf, if that pleases you. I made mini-muffins (just shy of 4 doz minis) for easier sharing at the yoga studio tomorrow, but I think a loaf or full size muffins would behoove the bread or non-frosted teacake experience. Enjoy!

unnamed

Pumpkin-Stout Bread

Mini cupcake liners [or coconut oil for greasing the pan if making a loaf]

1 3/4 C all-purpose flour

1 tsp baking powder

1/2 tsp baking soda

1/2 tsp salt

1 1/2 tsp ground cinnamon

1/2 tsp ground ginger

Pinch ground nutmeg

Pinch ground allspice

3 TBSP vegan butter

1 C pumpkin purée (not pumpkin pie filling)

1 C brown sugar

1 TBSP Ener-G Egg Replacer [Mixed in 4 TBSP warm water]

1 C stout beer*

1. Preheat oven to 350°F. Line mini muffin pans (or grease 9-inch loaf pan). Combine the flour, baking powder, baking soda, salt, cinnamon, ginger, nutmeg, and allspice in a large bowl.

2. Melt the butter in a medium saucepan over low heat. Remove from the heat. Stir in the pumpkin and brown sugar, then stir in the egg replacer mixture. Finally, stir in the stout*. Add the pumpkin mixture to the dry ingredients and stir just until combined. Transfer the batter to the lined mini muffin pan or greased loaf pan.

3. Bake until a toothpick inserted into the center of the loaf comes out clean, 14 minutes for mini muffins (about 1 hour for loaf). Cool thoroughly before serving.

unnamed-2

Leftover pumpkin bread can be wrapped in foil or plastic wrap and stored at room temperature for up to a few days.

*If choosing not to use beer, any vegan milk will suffice. I suspect black tea or earl grey might also be a nice experience.

unnamed-4

Option: Pumpkin-Stout Cupcakes

Add a dollop of cinnamon-ginger frosting (or pumpkin spice frosting, if that tickles your fancy). I made a buttercream frosting with Glenlivet & Pumpkin Pie Spice blend to top these bite-size beauties.

1 C Earth Balance Vegan Butter

2 C sifted powdered sugar

3-4 tsp Glenlivet

2 tsp vanilla extract

2-3 pinches of Pumpkin Pie Spice blend

Read Full Post »

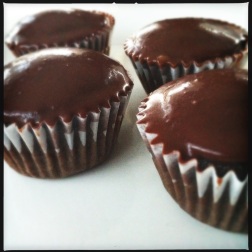
Double Dip Chocolate Cuppies“Did you just double-dip that cupcake?”

I did, Timmy.. I dipped, then I dipped AGAIN! I made the Redux: Red Velvet Cake cuppies (mini-sized), and then dipped into a chocolate glaze. When making the cuppies, fill the cups a little more than normal so they have a little peak over the edge of the cup. I let the cuppies and single dip chill in the fridge for about 10 min..then I dipped again! 🙂

Chocolate Glaze:
scant 1/3 C So Delicious Coconut Milk Beverage or other milk alternative
heaping 1/3 C chocolate chips (I used semi-sweet, but I bet a dark chip would also be nice. You could also chop up your favorite chocolate bar into 1/3 C.)

Heat milk over medium heat until steaming, but not simmering or boiling. Pour over chocolate and let sit a few moments (I hand-washed the pot that I steamed the milk in, then went to whisk). Whisk to create a glossy emulsion. Let chocolate cool on the counter about 10 min. If you’re in a colder ambient temperature location, it may not take as long. Once both cuppies and chocolate are cooled, dip cuppies in the chocolate gloss. Let chill in the fridge about 10 min, then dip again.. feel free to dip as many times as you like, letting them chill in the fridge between each dip. This recipe will make more than is needed for the cupcake recipe, so you can double the cupcake recipe..say for a potluck or party situation. And I’ve never heard of anyone complaining because there is extra chocolate glaze.. glaze pancakes, scones, or sundaes the next morning, or skip the middleman and just glaze your tongue. 😉

Happy Baking!

Double Dipped Chocolate CuppiesConfectioner’s note: If you want a sturdier chocolate – i.e. one that doesn’t soften at the touch – then simply melt the chocolate in a double-boiler and omit the milk step.

//

Read Full Post »

I made this recipe twice – the first time as a full cake for our Cherry Blossom Yoga vegan holiday potluck, the second time (after a little recipe tweaking) as mini-muffins for the Breakfast Yoga Club in The Woodlands. Both came out delicious, but I think after the recipe tweaking it’s now a supreme recipe! The original recipe was veganized from Food & Wine, plus I added in a Chai-spice upgrade. 😉 This recipe makes 1 10-inch crumb cake or 42-46 mini-muffins. Enjoy!

Ingredients:

Spiced Cake
2 TBSP ground flaxseed in 4 TBSP warm water
1/2 C almond or hemp milk + 1/4 tsp apple cider vinegar
2 C + 2 TBSP AP (sifted) or Cake flour
1 C turbinado/sucanat sugar (or 1/2 C granulated + 1/2 C brown sugar)
1 tsp baking powder
1 tsp baking soda
1 tsp mace
1/2 tsp each Cardamom, Cloves
1/4 tsp each Ginger, Allspice, Black pepper
1/2 tsp salt
1 tsp vanilla extract
1/2 C canola oil

Crumb Topping
3/4 C AP flour
1/4 + 1/8 C turbinado/sucanat sugar
1/4 tsp baking powder
pinch of salt
1/4 C canola oil

Directions:

1. Make the cake: Preheat oven to 350°F. In a small bowl, combine ground flax and water; set aside. In a small measuring cup, mix together the milk and apple cider vinegar; set aside.
2. In a large mixing bowl, combine dry ingredients and spices.
3. Add in canola oil, ground flax combo, milk mixture, and vanilla extract. Stir to combine; set aside.
4. Make the crumb topping: Whisk together all the dry ingredients. Pour in canola oil, and massage together with your fingers until it becomes crumb-like.
5. Spoon the batter (it’ll be a little thicker, not so much pourable as scoopable – like a really soft cookie dough) to a greased/floured 10′ springform pan or lined mini-muffin tin (about half-full each mini-muffin). Top with crumb topping.
6. Bake at 350°F for 40-45 min (for the full cake) or 12-14 min (for mini-muffins).

Happy baking!

On this day in History: Chai Granola

//

//

Read Full Post »

Red Velvet CupcakesThe first time I posted about Red Velvet Cuppies, I did mini’s and the frosting didn’t turn out as well as could be expected, so the post was lacking in standard Primate verve.. So here’s the redux post. This time I made full-size, since I didn’t have enough liners for minis.. and sometimes it doesn’t hurt to go standard-sizing – I’m just a gnome deep down, and love all things mini or gnome-size. 🙂 But who’s really going to turn down a cupcake, regardless of size.. honestly. This recipe makes 12 regulars, or about 24-32 minis. I old-school frosted with standard vegan Buttercream Frosting. Enjoy!

Ingredients:

Red Velvet Cuppies:

1 C hemp or almond milk
1 tsp apple cider vinegar
1/2 C turbinado sugar
1/3 C canola oil
1.5 tsp vanilla extract
1 C oat flour
1/4 C AP flour
1/3 C cocoa powder
3/4 tsp baking soda
1/2 tsp baking powder
1/4 tsp salt
red food coloring, as needed (or omit for a basic chocolate cupcake)

Buttercream Frosting: [this will make enough for piping the frosting, if frosting old-school style freehand..HALF the recipe]

1 C Earth Balance Vegan Butter, lightly softened
4.5-5 C sifted powdered sugar (I put in 3 C as the original recipe called for, but then added about 1.5-2 C more..didn’t measure it, but added until it was the right consistency)
2 TBSP Coconut Milk Beverage or Almond Milk
1 TBSP vanilla extract

Directions:

1. Preheat oven to 350°F. Line a 12-muffin tin with cupcake liners (or opt for minis). In a large measuring cup, combine milk and apple cider vinegar. Set aside.

2. In a mixing bowl, stir together sugar and oil. Pour into milk mixture. Set aside.

3. In same mixing bowl, sift (or whisk) together flours, cocoa powder, baking soda & powder, and salt. Add liquid mixture. Stir to combine. Add red food coloring to desired color.

4. Allocate around 1/4 C per cupcake for regulars (about 1 TBSP or so for minis). Bake at 350°F for 18-22 minutes for regulars, 12-15 minutes for minis.

5. Let cool while you make the UnButtercream Frosting in a stand mixer. Frost. Enjoy!

Red Velvet Cupcakes

Happy Baking!

On this day in History: New Years Eve @ 1323 Menu

//

Read Full Post »

Readers may be surprised by this, but I find it absolutely impossible to follow a recipe exactly – even ones I’ve developed myself!  I always think, oh, it would be great to add a little of this, or leave out just a little of that.  The downside is that sometimes things are not quite as delicious as they could be, but the upside is that sometimes I improve on things.  So, I was baking my other Chocolate Chip Cookies, which are a bit on the thick side, and wanted them to be a little bit thinner, with tantalizingly crisp edges, and soft gooey middles.  And here it is, my new and improved chocolate chip cookie recipe:

Ingredients:

2 TBS flaxseed meal combined with 1/4 C water, and then microwaved for 30 seconds

1.75 C AP flour

1 stick Earth Balance buttery sticks

1 stick Earth Balance shortening

1 C cane sugar

1 tsp baking soda

1/2 tsp salt

2 tsp vanilla

1 bag chocolate chips

1 C nuts (optional)

Instructions:

1.  Soak the flaxseed meal in warm water for at least 10 minutes.  Preheat oven to 400 degrees.

2.  Cream the Earth Balance sticks with the sugar.

3.  Add vanilla and flaxseed goo.

4.  Add dry ingredients in a few stages, mixing each thoroughly.

5.  Mix in chips and nuts.  Taste test!

6.  Roll spoonfuls of dough into balls.

7.  Bake at 400 degrees for 9-10 minutes.

On this day in History: Roasted Corn Salsa

//

Read Full Post »

I’ve been interested in dabbling in raw food for some time now, but after spending a month eating a greater portion of raw food than normal I knew I had to get on it post-haste! For my birthday last week, I made these babies.. they’re mostly raw – and I say mostly because the Agave Nectar I had on hand was not raw, nor the tablespoon of maple syrup used in the tart crust… so almost raw. You can certainly adapt to a full raw version by using raw agave, subbing agave in the crust and using water in place of the coconut milk beverage in the cashew cream. But even though it was “almost raw” it was still super delicious, and doesn’t sit heavy like most baked treats. The recipe was adapted from Raw Food Real World. They used dehydrated cherries, but I like the fresh blueberries..but feel free to use whatever sturdy berry suites your fancy. Makes about 36-42 mini tartlets, or 1 standard size tart.

Ingredients:

For the tart crust:
3.5 C almond meal
3 TBSP date paste (I pureed about 6 Medjool dates – pitted – in the food processor before starting)
1 TBSP maple syrup
3/4 C coconut oil
large pinch of sea salt

For the almond-cashew cream:
1.75 C raw cashews, soaked for at least 2 hrs
1/4 C raw slivered almonds, soaked for at least 2 hrs
1 C coconut flakes/shredded coconut, or coconut meat
1/4 C coconut milk beverage (or water)
6 TBSP coconut oil
2 TBSP vanilla extract (or 1 TBSP + 1 tsp almond extract + 2 tsp vanilla extract)
pinch of sea salt

For the topping:
4 C fresh blueberries (~ 2 pints)
1/4 C agave nectar
1 tsp vanilla extract

Directions:

1. Place the cashews and almonds, for the cream, in a large bowl with enough water to cover. Set aside for at least 2 hrs. Place the blueberries in a bowl with the agave and vanilla. Stir to combine. Set aside until needed.
2. Tart Crust: In a food processor, mix together all the crust ingredients until thoroughly combined. Line individual mini tart shells (or one large tart shell) with plastic wrap. Divide the dough between the shells and press evenly into the sides and bottom – to create an even thickness throughout. Refrigerate until firm – at least 1 hour or more – and keep refrigerated until ready to fill. **Because I used mini tartlet shells..it took the time the nuts for the cream required to soak to complete this task. If you’re using a single standard tart shell, it would go much faster and you’d have some time to dawdle.

Almost Raw Fresh Berry Tart
3. Cashew-Almond cream: In a food processor or high speed blender, puree all the cream ingredients until completely smooth – stopping to scrape down the sides as needed. **If necessary, you can slowly increase the amount of coconut milk beverage to adjust consistency. Caution, if you add too much the cream will not stay firm in the tart shells..so better to err on the side of a thicker cream. 🙂
4. Fill each tart crust with the cream, creating a flat surface at the top. Cover and return to the refrigerator to chill and set – about 2 hours or more.

Almost Raw Fresh Berry Tart
5. Assembly: Remove the tarts from the fridge and the use the overhanging edges of the plastic wrap to carefully pull the tarts from their shells. If using a standard size tart shell, it should have a removable bottom from which you simply lift the tart out. Top each tart – or single tart – with the delicious soaked berries.

Almost Raw Fresh Berry Tart*Note: Keep covered in the fridge. These have kept in my fridge for at least 5 days, and are still tasty. Of course, the fresher the better.. but if they survive the hungry masses a few days, they’ll still be delicious.

Happy Unbaking! 😉

Read Full Post »

SunButter Cookie

Smiling cookie 🙂

They’re veritable kissing cousins, this sunbutter cookie and their nutty counterpart, the peanut butter cookie. The difference is the awesome nut-free goodness of SunButter. And if you use a gluten-free flour, these are gluten-free to boot! I used a 50/50 blend of buckwheat and all-purpose, so it’s possible to make these GF, just adjust the amount of flour to result in a sturdy enough consistency to resist spread during baking. They are flaky and delicate, moist and crumbly, and are perfect with a yummy cup of tea. These cookies are many things, insipid not being one of them. 😉 And is it just me..or does the cookie look like he’s laughing/smirking?

Ingredients:

8 oz (two sticks) Earth Balance Vegan Butter, room temperature
1/2 C turbinado sugar
1/3 C brown sugar
1/4 C mixture of almond milk and canola oil (approx a 50/50 ratio)
1 tsp vanilla extract
1 tsp almond extract
1 C chunky (or creamy) SunButter
1/4 tsp salt
1 tsp baking soda
2.5-2.75 C buckwheat (for gluten-free) or oat flour (*start with 2 C flour & add accordingly to make the dough the right consistency so as not to flatten out during baking – if you use regular AP flour, the 2 C should be fine..but you may need to add more)

Directions:

1. Cream the Earth Balance, SunButter and sugars until light. Add the almond/canola mix (or flaxseed mix), vanilla, and almond extracts. Blend together.
2. Add the salt, baking soda, and flour. Mix until well combined.
3. Preheat to 350°F. The dough can rest in fridge or on the counter.
4. Using a well-rounded teaspoon of dough for each cookie, drop the dough onto a cookie sheet. I used a small melon-baller to just scoop and drop..scoop and drop..very easy peasy!

SunButter Cookie
5. Bake 8-12 minutes, until the cookies are light golden brown. Cool on racks.

**Additionally, you could smother in some ganache for a more decadent treat..but these babies are delicious all on their own!


SunButter Cookie

Happy Baking!!

On This Day In History: Golden Delight (tea)

Read Full Post »

Chocolate Stout Cuppies and Irish Whiskey FrostingThe springtime inspires me to get back into baking.. and of course, who doesn’t love St. Patty’s Day?! Ever since I saw this recipe on my Facebook feed, I knew I had to make them. I actually made the cuppies pretty much verbatim, so I’ll simply include a link with the photos.. I did use olive oil in place of canola (didn’t have any canola on hand), but it worked out nicely! Check it out! Super deliciousness awaits you… 🙂 This recipe made about 5 dozen mini cuppies – and I baked at 350°F for 15 minutes.

Chef Chloe’s recipe – NOM NOM!

Chocolate Stout Cuppies and Irish Whiskey FrostingChocolate Stout Cuppies and Irish Whiskey Frosting

I did, however, tweak the frosting recipe a bit..so here’s my frosting recipe:

Ingredients:

1 C Earth Balance Vegan Butter, lightly softened
4.5-5 C sifted powdered sugar (I put in 3 C as the original recipe called for, but then added about 1.5-2 C more..didn’t measure it, but added until it was the right consistency)
4 TBSP Irish Whiskey
2 TBSP Coconut Milk Beverage
1 TBSP vanilla extract

Directions:

1. Dump all ingredients into a mixer. Mix until smooth and delicious – adjusting moisture level as needed.
2. Taste for quality control, and frost cooled cuppies.

Chocolate Stout Cuppies and Irish Whiskey Frosting

Happy Baking!

Read Full Post »

Vegan Samoas

You may have seen the unpaid female child labor hawking their animal-torture based cookies out in front of your grocery store.  It’s that time of year.  I can admit to enjoying a thin mint back in the day.  They’re pretty refreshing out of the fridge.  But hands down, the best creation ever conceived was a shortbread cookie topped with caramel, coconut and chocolate:  the Samoa.  My love for Samoas cannot be contained by our meager language.  I could definitely put away a box of them in one day.  In fact, they were the last non-vegan food I ate on purpose.  Five years ago.  I haven’t had a Samoa in five years.  Until now.  I can’t believe it took me this long to do it.  But here they are for you all to enjoy – Vegan Samoas.

Although this recipe seems to have many steps, each of them is pretty simple.  It takes a while from start to finish, but mostly it’s a hurry up and wait game, until the final assembly, which doesn’t take long.

Ingredients:

Cookies:

2 C flour
1/3 C confectioner’s sugar
1/3 C turbinado sugar
1/4 tsp salt
2 tsp vanilla
2 sticks Earth Balance

Caramel:

3/4 C hemp milk
1.5 tsp cornstarch
3/4 C brown sugar
3 TBSP Earth Balance vegan butter
1.5 TBSP brown rice syrup
pinch of salt
3 tsp confectioner’s sugar

Topping:

2 TBS shredded coconut, toasted
1 ounce semi-sweet chocolate, melted

Instructions – cookies:

1.  Place all dry ingredients in a food processor, and give a few quick pulses to blend.

2.  Cut “butter” into pieces and add to food processor, along with vanilla.  Blend for 20-30 seconds, or until the mixture resembles course cornmeal.

3.  Turn onto lightly floured surface and kneed a few times to form a dough.  Roll into a ball.

Warning!  This cookie dough tastes fantastic, and harbors no salmonella, but if you eat it all, you will have no Samoas!

4.  Cover with plastic and refrigerate for 1 – 24 hours.

5.  Preheat oven to 350 degrees F.  Roll dough out onto a lightly floured surface and cut with cookie cutters.

6.  Bake at 350 degrees for 12-14 minutes.  This is a very unusual case where you want the cookies to be slightly crispy.  Let cool while you prepare the caramel.

Warning!!  At this stage, the cookies are in fact already delicious, and it’s wise to find a disfigured one to perform quality control tests on, just to make sure.  But, if you eat all of them, you will end up with no Samoas!

Instructions – caramel: (based on Sara’s dulce de leche)

1. Place hemp milk, cornstarch, sugar, vegan butter, and brown rice syrup in a small stainless steel pan and bring to a simmer over medium-low heat, stirring frequently to prevent burning.

2. Cook gently for 15 minutes, stir in the pinch of salt and the confectioner’s sugar. Continue to cook gently until the mixture thickens enough so that a spoonful dropped on piece of parchment holds together, about an additional 5 to 10 minutes. You know you’re there when you can run a spoon through it and it doesn’t run back together immediately.

3.  Remove from heat and begin cookie assembly.

Instructions – assembly:

1.  After the caramel has cooled for five minutes or so, you can start the assembly line.   Drop spoonfuls of caramel on top of each cookie, and spread it to the edges.  As soon as possible, sprinkle the toasted coconut on top.  It’s great to have a helper for this, to see to the coconut, while you work on the caramel.

Warning!  A shortbread cookie with caramel and coconut on top is a wonderful idea all by itself.  However, if you eat them all at this stage, you still will not have had any Samoas!

2.  After all the cookies have the caramel and coconut, it’s time to melt the chocolate in a double boiler.  Drizzle spoonfuls of chocolate over the cookies.

3.  Place cookies in refrigerator for 10 minutes to set everything.

Warning!!  Consumption of more than 2-3 cookies will likely lead to sugar-induced coma.

Share

Read Full Post »

“Little darling, it’s been a long cold lonely winter…Little darling, the smiles returning to the faces.” Ah, haven’t had many posts in a while, let alone a Beatles reference as awesome as Strawberry Fields Forever. Well, here ya go.. with both! I’m on a bizarre, obsessive SunButter kick right now. Last Sunday we had SunButter Kind of Love Fudge, and today we have Here Comes the SunButter Cups! To alleviate some of your pain from the cold (and from the lack of posts), I created these beauties for you. So for all those out there who have peanut allergies and the like, I give you a SunButter Cup that is equally delicious to it’s nutty cousin, the peanut butter cup. Made from sunflower seeds, these are a great nut-free, gluten-free, tree nut-free alternative. Of course, check your chocolate as well.. but at least the filling is copacetic for the allergy-laden gnomies in the crowd. So “here comes the sun, here comes the sun, and I say it’s all right.”

Ingredients:

2 C vegan chocolate chips, or a chopped chocolate bar to 2 C (make sure you quality control your chocolate by tasting it prior to melting – if it needs to be sweetened add some sugar accordingly)
1 TBSP Earth Balance Vegan Butter *optional for a more ganachey consistency or leave it out if you don’t want the added fatty goodness
1/2 C SunButter, creamy or chunky – however your prefer your cups
1/4 C powdered sugar, sifted
pinch of salt
1 tsp vanilla

Directions:

1. In a small sauce pan, add about 1-inch of water and bring to a boil, reduce heat to simmer. In a dry, heat proof glass bowl, add chocolate chips, 1 TBSP vegan butter, and sugar (if necessary) and place over the simmering water. Keep an eye on it..make sure no steam or water droplets get into the water – this can cause the chocolate to seize..and well, seizing chocolate isn’t as fun as seizing the finished product into your gently smiling jaws. If your chocolate suddenly clumps up and looks gross and no longer shiny, it’s been seized – there’s no saving it, so set aside to eat at a later moment and start over. The melting takes only about 5-10 minutes, so be patient. As I said before, in the PB Cup post, that equally applies here: “As with almost everything in life – you start out cute as a button, go through an awkward, only-see-the-inner-beauty phase, then before you know it you only have a few lumps…and you blossom into smooth, luscious ganache!”

2. Meanwhile, with a hand mixer or wooden spoon, combine SunButter, sugar, salt, and vanilla until combined. Fill a pastry bag with the SB mixture and set aside, [or prep a melon baller or small spoon]. **When you’re ready for it, microwaving the SB mixture (before adding it to a plastic pastry bag) for about 30 seconds will help make the mixture easier to work with.


3. In a mini-muffin tin lined with candy/foil wrappers, fill with about 1 tsp melted chocolate with a spoon, a small melon baller, or chocolate in a pastry bag (the latter two I find to make things more manageable, but feel free to get your fingers dirty. What a tragedy..licking chocolate-covered fingers.) Place a hefty dollop, about 2-3 tsp of the SB mixture (again a pastry bag or melon baller seems to make things easier for me) and press down so it’s cozy in the chocolate. Top with remaining melted chocolate, about another tsp, to cover SB center. Give the muffin tin a good shake, then place in fridge about 15-20 minutes for chocolate to set!

*Confectioner’s Notes: Your chocolate bowl needs to be 100% dry – not a speck of water. Don’t rush the melting of the chocolate. Stir occasionally with either a wooden spoon or rubber spatula. Remember…good things come to those who wait, and those who rush get unworthy chocolate. Keeping the heat low will also help prevent the burning of the chocolate – which is also not a good thing.


Happy Baking!

Read Full Post »

Older Posts »