Feeds:
Posts
Comments

unnamed-3While the desired weather of Autumn may still be of an ebb and flow nature here in Houston, the feeling of soups, roasted vegetables, and spiced baked goods is in full effect. It’s a moon day today, so I get the day off from my Ashtanga yoga practice, my teaching practice, and as much of my work as possible. On moon days, I like to visit with the sprouting fall veggies in the garden, snuggle with Marley, and bake.

On this moon day, I present to you Pumpkin-Stout Muffins. You can also make this in a 9-inch loaf, if that pleases you. I made mini-muffins (just shy of 4 doz minis) for easier sharing at the yoga studio tomorrow, but I think a loaf or full size muffins would behoove the bread or non-frosted teacake experience. Enjoy!

unnamed

Pumpkin-Stout Bread

Mini cupcake liners [or coconut oil for greasing the pan if making a loaf]

1 3/4 C all-purpose flour

1 tsp baking powder

1/2 tsp baking soda

1/2 tsp salt

1 1/2 tsp ground cinnamon

1/2 tsp ground ginger

Pinch ground nutmeg

Pinch ground allspice

3 TBSP vegan butter

1 C pumpkin purée (not pumpkin pie filling)

1 C brown sugar

1 TBSP Ener-G Egg Replacer [Mixed in 4 TBSP warm water]

1 C stout beer*

1. Preheat oven to 350°F. Line mini muffin pans (or grease 9-inch loaf pan). Combine the flour, baking powder, baking soda, salt, cinnamon, ginger, nutmeg, and allspice in a large bowl.

2. Melt the butter in a medium saucepan over low heat. Remove from the heat. Stir in the pumpkin and brown sugar, then stir in the egg replacer mixture. Finally, stir in the stout*. Add the pumpkin mixture to the dry ingredients and stir just until combined. Transfer the batter to the lined mini muffin pan or greased loaf pan.

3. Bake until a toothpick inserted into the center of the loaf comes out clean, 14 minutes for mini muffins (about 1 hour for loaf). Cool thoroughly before serving.

unnamed-2

Leftover pumpkin bread can be wrapped in foil or plastic wrap and stored at room temperature for up to a few days.

*If choosing not to use beer, any vegan milk will suffice. I suspect black tea or earl grey might also be a nice experience.

unnamed-4

Option: Pumpkin-Stout Cupcakes

Add a dollop of cinnamon-ginger frosting (or pumpkin spice frosting, if that tickles your fancy). I made a buttercream frosting with Glenlivet & Pumpkin Pie Spice blend to top these bite-size beauties.

1 C Earth Balance Vegan Butter

2 C sifted powdered sugar

3-4 tsp Glenlivet

2 tsp vanilla extract

2-3 pinches of Pumpkin Pie Spice blend
Grated Carrot Salad

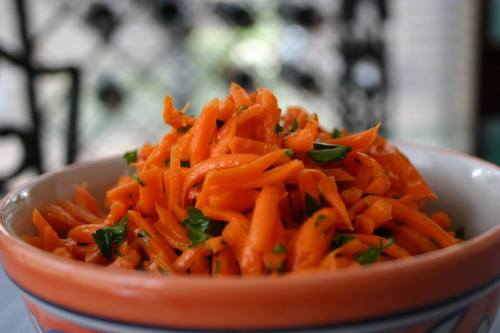
It’s been ages since either my sister or I posted a recipe, and there’s nothing like spending a week in the springtime on a hops farm to inspire fresh and new creations. A vegetable that, for reasons unknown, always fails to grab my attention when I’m deciding what to prepare is the carrot. I grow them in my garden and end up eating them raw right from the dirt (washed, of course), and yet when I think of dishes, they only ever make it into a medley of roasted veg. So here’s a fresh idea for summer picnics and gatherings, or to accompany other salads in a crudité-style plate. This recipe takes no time at all to put together. I didn’t time it, but maybe 10-15 minutes…


Ingredients:

4 large carrots, shredded (roughly 4 C)

Juice from 1/2 large lemon (lime might also be nice)

1-2 TBSP extra-virgin olive oil

1/2 bunch cilantro (or parsley)

Salt and Pepper to taste


Directions:

  1. Grate the carrots with a box grater or Salad Master. You want about a medium grate – not too small, not too large.
  2. In a large bowl, toss together the carrots, lemon juice, oil, cilantro (or parsley), salt, and pepper.
  3. Enjoy.

Inspiration for your Memorial Day Weekend: Memorial Day Munchies

Macarons

macaron2Two friends of mine came back from a trip to Paris last week, and promptly started baking macarons. They are so cute and colorful, and probably delicious. I wouldn’t know for sure, since I had never heard of such a thing in my pregan days. That was well before the gourmet cupcake had been thought off, let alone the delightful looking macaron. They are essentially a meringue cookie, and of all the ways to substitute eggs, stiffened egg whites present the biggest challenge for us vegans. But I was jealous of my friend’s adorable treats, and scoured the internet for a recipe. There are a few out there, but they don’t look like the real thing (except for one blog with a great looking photo, but no recipe!). So, I did what I used to do before the Sticky Fingers cookbook came along – I made something up and gave it shot. This is my first attempt, and it is not perfect. The shell is crispy, and the foot is so cute, but they’re a little too wet inside, and the sweetness is off the charts. I filled them with a bittersweet ganache, just to cut through the sugar a bit. But based on my internet searches, the vegan world is crying out for macarons, and far be it from me to hold back what I have learned. I ask you, dear Primates, to try this out and improve it for the good of all veganity! My next attempt will definitely have less water, and probably less xanthan gum. But like I said, I’ve never eaten a “real” macaron and only know that they are supposed to have a crispy shell and a chewy middle. The crispy shell, I’ve got, but the chewy middle needs some work.

This recipe made 18 sandwiches.

Ingredients:

5.7 ounces powdered sugar – 1.5 C after sifting

3 ounces almond meal – 2/3 C

5 TBS granulated sugar

2 TBS Enrgy Egg Replacer

1/4 tsp xanthan gum

scant 1/2 C water

1 tsp vanilla

1 tsp oil

Directions:

  1. Line a cookie sheet with parchment paper. Preheat oven to 280 degrees.
  2. Sift together the powdered sugar and almond meal. Set aside.
  3. Combine egg replacer, xanthan gum and water. Whisk  until your arm simply cannot do it any more. Or if using an electric mixer with the whisk attachment, until you have soft foamy peaks.
  4. Add granulated sugar 1 TBS at a time, whisking after each addition until incorporated.
  5. Add vanilla and oil and whisk to incorporate.
  6. Add about half of the dry ingredients. Fold (do not stir) to incorporate. When mostly incorporated, add the remaining dry ingredients. Fold until combined.
  7. Fill pastry bag with batter. Pipe dollops onto cookie sheet, leaving about a half inch between them, as they will spread slightly, but not much.
  8. Bang the cookie sheet on the counter top a couple of times. This sounds weird, but it is supposed to help the cookies avoid cracking while they bake.
  9. Bake at 280 for 18 minutes. You want to leave them in long enough so that they don’t stick on the bottom any more, but not so long that they start to brown.
  10. Remove from oven and let cool completely. Since they are mostly air, this doesn’t take long. While you wait you make whatever filling you’d like to use. They cookies were so sweet, that I decided on a bittersweet ganache – just a few ounces of 78% chocolate, and a few TBS of coconut milk, melted over a double boiler. Sorry, I didn’t measure it. But you can’t really go wrong if you add the coconut milk in small stages until you get a smooth, shiny ganache.
  11. Pipe or spoon the filling between two cookies, and then try not to eat them all!

macaron1

A great classic breakfast for a holiday morning, or an average weekend morning! Top with your favorite jams, nectars, or butters (I think an apple or pumpkin butter would be top-notch for a holiday feast). This recipe makes about six 2″ mini biscuits, or 3-4 larger biscuits. Perfect if your baking for one or two, if you’re baking for more.. you can easily double the recipe without issue.

Ingredients:

1 C All-Purpose Flour (I used King Arthur Organic) – you could also use a 50/50 blend of AP and Cake Flour

1 tsp baking powder

1/4 tsp baking soda

1/4 tsp sea salt

3 TBSP Earth Balance Vegan Butter, super cold

3/4 C Coconut Milk + a splash of apple cider vinegar (I didn’t measure, but probably close to 1/8-1/4 tsp)

1/2 tsp vanilla extract

Directions:

1. Preheat oven to 400°F. Splash in the apple cider vinegar with the Coconut Milk, set aside.

2. Whisk (or blend with a fork) together the flour, baking powder, baking soda, and salt. With two knives (or pastry cutter), cut in the EBVB.

3. Add the vanilla extract to the “buttermilk.” Add milk mixture to flour/butter mixture. Stir until just combined. Slowly slowly, gently gently here. Once combined, turn out onto lightly floured surface and pat into a round until about 3/4-inch thick. Cut with biscuit cutters, or if you want to get whimsical.. any shaped cutter of choice.

4. Place biscuits on parchment lined baking sheet or pizza stone. Bake 16-18 min. If they aren’t brown enough to your liking.. you can turn on the broiler for a few. Serve with jams, agave nectar, Earth Balance, fruit, veg.. whatever! I topped mine with some festive Cranberry Habanero jam (found at the Feast of Artisans Farmer’s Market, handmade by the lovely Jackie’s Gourmet).

Buttermilk Biscuits

Happy Baking!

Sweet Green Juice

I know it’s been a while, and there’s been a relative lack in recipes lately.. Good news, I’ve got some downtime so I suspect that’ll change over the next few weeks. I’ve been busy leading a yoga teacher training, and it monopolizes most of my time for 6 weeks. I graduated a group of teachers on Saturday (Oct 13), and now for some much needed rest.. and baking! Before the baking and inevitable Halloween smorgasbord of deviously delectable treats ensues, let’s start with something healthy! A sweet and delicious green juice! It does require a juicer, but if all you have is a blender.. you could do the same juice, you’d just have a little more pulp and fiber present ~ certainly still good for you! For those hesitant on drinking kale and/or mustard greens.. trust me, with enough apple and citrus, you can’t taste the greens! This recipe makes enough for a single pint, or two 8 oz Soy Candles By Phebes-size glasses.

Ingredients:
2 leaves kale
2 leaves mustard greens
about 8 sprigs fresh cilantro
a few additional leftover kales stems (I made some kale the other night for dinner and instead of tossing the stems, I save them for juicing)
2 medium gala apples
1 small lime
1 small lemon
1 medium tangelo

Directions:

1. Wash all your fruit and veg. Chop your apple into slices that will fit in your juicer. Set up your juicer and turn on. 🙂

2. Juice all veg and fruit, save the citrus. Using a citrus juicer (or your monstrously strong hands), juice the citrus and strain into the greens and apple juice blend.

3. Drink and enjoy!

**NOTE: Fresh juice such as this doesn’t have a long shelf-life, so only juice what you’re going to drink immediately ~ preferably within 10 min, if not within the hour. Vitamins and nutrients begin to breakdown after the first 10 min of juicing.. so the sooner the better for maximum benefit.

Happy Juicing!!

On this day in history:

(2009) Double Chocolate Diablo

(2008) Sopapillas

Basic “Buttermilk” Pancakes

Basic Buttermilk PancakesAfter taking picture after picture of pancakes in various flavor permutations, i realized I didn’t have a basic buttermilk recipe on here! *GASP* So here it is.. a great morning breakfast, weekend brunch, or if you’re like me, a cozy dinner. 🙂 The other pancake recipes on the Primate are fluffier and more dense.. whereas these are little thinner and more moist. I like both styles.. some days I have a preference one way or the other. I’ll let you decide..

basic buttermilk pancakes

Ingredients:

2 C All-purpose flour

2 tsp baking powder
1 tsp baking soda
1/2 tsp salt
3 TBSP raw sugar (sucanat, turbinado, etc)
1/4 C canola or safflower oil
1/4 C hemp, almond or coconut milk
2-2.5 C hemp, almond or coconut milk + 1/4 tsp apple cider vinegar
4 TBSP Earth Balance Vegan Butter + more for greasing the skillet
2 tsp vanilla extract
Directions:
1. Heat a heavy skillet over medium heat. Proceed with mixing while the skillet gets good and hot.

2. In a measuring cup, mix 1/4 tsp ACV + 2.5 C vegan milk. Set aside to “buttermilk-ify.”

3. Melt 4 TBSP EBVB, set aside.
4. Whisk together the flour, baking powder, baking soda, salt, and sugar. [sidenote: If you want to add things like cinnamon or other spices.. now would be the time].
5. Add 1/4 C oil and 1/4 C milk to dry ingredients. [It’ll be kinda lumpy until you add more moisture].
6. Add 2 tsp vanilla extract and 2 C of the “buttermilk”.. determining if you need the last 1/2 C or not based on the consistency of your batter. The thicker the batter, the thicker/denser the pancake will be. The thinner the batter, the more slender the pancake will be. Again, this is a personal choice. You could even add up to 3 C milk for *really* thin pancakes.. I have never found the need.
7. Stir until just mixed ~ don’t overmix the batter.. a few lumps are okay.
8. Pour about 1/4 -1/3 C batter per pancake.. Once the cake starts popping bubbles or the sides are congealing.. it’s time to flip! Mine don’t take very long since they’re thinner. I barely have time to walk away from the stove. Probably about 2-3 min per side (depending on thickness).
9. Top with favorite jam, syrup, or powdered sugar. Enjoy!
basic buttermilk pancakes
Add-ins: fresh blueberries; spices like cinnamon, clove, or nutmeg; alternative extracts like almond or coffee.. so many variations can be created using this base recipe!
🙂
Happy Cooking!

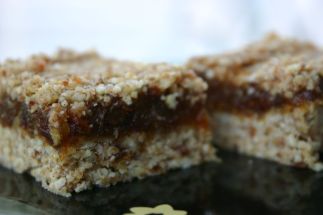
Raw Date Bars

I fell in love with date bars last year in South Lake Tahoe.. So in love that I’ve carried around an ingredient list from a date bar that I ate in 2011, purchased at one of the cutest little hippie grocers (Grass Roots). And after a second venture to Lake Tahoe, and many a date bar from Grass Roots.. I came home and made my own! This recipe makes a small batch – enough for a bread loaf pan – but feel free to double and make in an 8×8 cake pan.

Ingredients:

Crust:

1/2 C raw almonds (no need to soak, unless you want to)
1/4 C raw walnuts (no need to soak, unless you want to)
3/4 C rolled oats
5 dates, pitted and roughly chopped
1/8-1/4 C coconut oil, melted [you can use less coconut oil and it’ll still come out nicely..if you need a little extra healthy fat in your diet, use the 1/4 C]
1/4 tsp salt

Filling:

12-14 dates, pitted and roughly chopped
1/4 C water

Instructions:

1. Crust: Place all crust ingredients (except the coconut oil) in a food processor. Blend until crumbly. Add melted coconut oil and blend until combined. This entire process does NOT take very long at all.

2. Remove 1/4 C of the crust and set aside. In a lined bread loaf pan (or if doubling, use an 8×8 cake pan lined with parchment), spread the crust evenly in the bottom. Place in fridge while you make the filling.

3. Filling: Place 12-14 pitted dates into a food processor. Begin to blend..and slowly add the water as you blend. Blend until preferred smoothness. Spread puree onto crust.

4. Topping: With remaining 1/4 C crust, add in a dash of ground clove and about 1/4 tsp cinnamon. Mix with a fork, then sprinkle on top of date puree.

5. Chill in fridge 1 hr (to overnight). Slice and enjoy!

Raw Date Bar

Happy Processing! 🙂

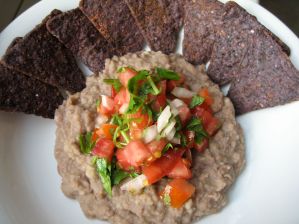
On this day in History: Refried Beans

//

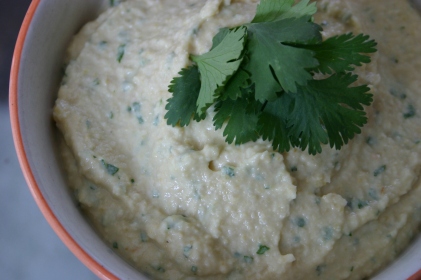
Green Chile Hummus

I *heart* hummus.. and I *heart* green chiles from New Mexico. After Jo’s inspiring Jalapeño & Cilantro hummus, and after not finding any green chile hummus in the Co-Op in Santa Fe on my trip home from Lake Tahoe.. I decided to make my own green chile hummus using green chiles from El Patio de Albuquerque (the source of our green chiles in such recipes as Green Chile Potatoes and Green Chile Rice). I think at this recipe, it’s a good medium heat — mellow enough for dad, but enough to tell there’s some heat present. If I were making it solely for myself (or Jo), I’d probably add another 2 TBSP of green chile sauce. If that’s the case, you’d probably also have to add in more chickpeas so it doesn’t get too runny of a consistency. Without further ado.. here’s Green Chile Hummus! 🙂

Ingredients:

2 C cooked chickpeas

3 small (or 1 medium-large) garlic clove

4 TBSP Green Chile Sauce – I used El Patio de Albuquerque’s house-made sauce..but you may use any green chile sauce of choice

3 TBSP fresh lime juice

3 TBSP olive or safflower oil

1/2 tsp salt

1/2 C fresh cilantro

Instructions:

1.  Put chickpeas, garlic, green chile sauce, salt, olive oil and lime juice in food processor and blend until very smooth (1-2 minutes).

2.  Add cilantro and pulse the food processor a few times, until cilantro is mixed in.

3.  Remove from food processor and serve, or store in refrigerator for up to a couple of days.

Happy Blending!

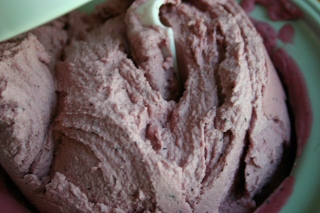
On this day in History: Blueberries & Cream Ice Cream

This blog has been on the back-burner, but I wanted to post it because there’s another new blog – Plant-Based On a Budget – so maybe “thrifty vegan” is a trending topic.

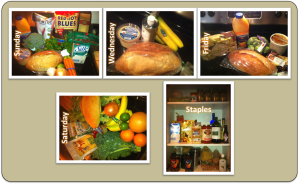
I thought it might be good to track a week’s worth of groceries. I did this partly because the groceries look delicious. I’m not sure my pictures do them justice, but feel free to feast your eyes. I also just had no idea how much things cost. It can be enlightening to simply track expenses. This seems to be an average week, but this isn’t intended to be scientific. Also note that there are two of us, about average-sized, both active with maybe two meals eaten out weekly. So what we find is a pretty solid distribution with about $150 total for the week’s groceries.

Beautiful vegan spreads for each day - click to bigify.

Does $150 make sense? The Census reports the cost of a “nutritious diet” on thrifty, low-cast, moderate, and liberal level. the “liberal” cost for “nutritious diet” for a family of two is just over $150 for 2009 and 2010. The “thirfty” plan for a…

Click to see weekly cost

family of two is only $80. Just with a quick adjustment, removing ProBars first, pre-made Whole Foods Lentil Soup, deluxe chips, deluxe orange juice, and hummus, the total plummets to just $83.07. Obviously one might swap some hummus with sprouts and add some lower-cost staples (beens, split peas, etc) to replace the calories from the ProBars (which is on the order of 6 days of calories). However, we also compare this diet with nearly no effort to reduce costs.

Jo notes that the census data indicate that a male and female living together spend about $25 more in food living together versus separately. “I guess married people do put on weight…”, she says. The census also reports average food costs. Oddly, they provide three kinds of meats and dairy, but nothing for lentils and beans, thus acknowledging no vegan alternative for protein intake.

In any case, this is a small sample size. A vegan diet, at least for us, is no budget-breaker, but it doesn’t seem super-cheap either.

Brussels sprouts, barbarian style, for maximum yum

Double Dip Chocolate Cuppies“Did you just double-dip that cupcake?”

I did, Timmy.. I dipped, then I dipped AGAIN! I made the Redux: Red Velvet Cake cuppies (mini-sized), and then dipped into a chocolate glaze. When making the cuppies, fill the cups a little more than normal so they have a little peak over the edge of the cup. I let the cuppies and single dip chill in the fridge for about 10 min..then I dipped again! 🙂

Chocolate Glaze:
scant 1/3 C So Delicious Coconut Milk Beverage or other milk alternative
heaping 1/3 C chocolate chips (I used semi-sweet, but I bet a dark chip would also be nice. You could also chop up your favorite chocolate bar into 1/3 C.)

Heat milk over medium heat until steaming, but not simmering or boiling. Pour over chocolate and let sit a few moments (I hand-washed the pot that I steamed the milk in, then went to whisk). Whisk to create a glossy emulsion. Let chocolate cool on the counter about 10 min. If you’re in a colder ambient temperature location, it may not take as long. Once both cuppies and chocolate are cooled, dip cuppies in the chocolate gloss. Let chill in the fridge about 10 min, then dip again.. feel free to dip as many times as you like, letting them chill in the fridge between each dip. This recipe will make more than is needed for the cupcake recipe, so you can double the cupcake recipe..say for a potluck or party situation. And I’ve never heard of anyone complaining because there is extra chocolate glaze.. glaze pancakes, scones, or sundaes the next morning, or skip the middleman and just glaze your tongue. 😉

Happy Baking!

Double Dipped Chocolate CuppiesConfectioner’s note: If you want a sturdier chocolate – i.e. one that doesn’t soften at the touch – then simply melt the chocolate in a double-boiler and omit the milk step.

//