Feeds:
Posts
Comments

Posts Tagged ‘Raw’

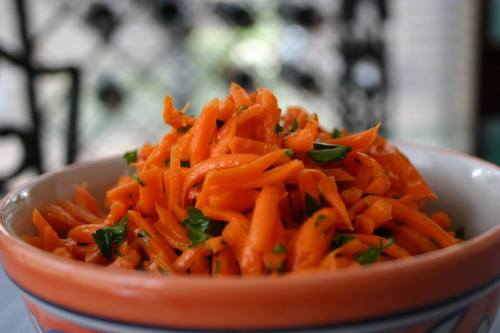
It’s been ages since either my sister or I posted a recipe, and there’s nothing like spending a week in the springtime on a hops farm to inspire fresh and new creations. A vegetable that, for reasons unknown, always fails to grab my attention when I’m deciding what to prepare is the carrot. I grow them in my garden and end up eating them raw right from the dirt (washed, of course), and yet when I think of dishes, they only ever make it into a medley of roasted veg. So here’s a fresh idea for summer picnics and gatherings, or to accompany other salads in a crudité-style plate. This recipe takes no time at all to put together. I didn’t time it, but maybe 10-15 minutes…


Ingredients:

4 large carrots, shredded (roughly 4 C)

Juice from 1/2 large lemon (lime might also be nice)

1-2 TBSP extra-virgin olive oil

1/2 bunch cilantro (or parsley)

Salt and Pepper to taste


Directions:

  1. Grate the carrots with a box grater or Salad Master. You want about a medium grate – not too small, not too large.
  2. In a large bowl, toss together the carrots, lemon juice, oil, cilantro (or parsley), salt, and pepper.
  3. Enjoy.

Inspiration for your Memorial Day Weekend: Memorial Day Munchies

Read Full Post »

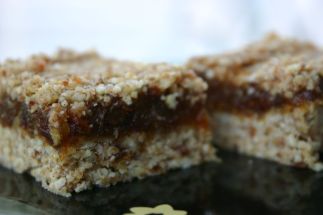
I fell in love with date bars last year in South Lake Tahoe.. So in love that I’ve carried around an ingredient list from a date bar that I ate in 2011, purchased at one of the cutest little hippie grocers (Grass Roots). And after a second venture to Lake Tahoe, and many a date bar from Grass Roots.. I came home and made my own! This recipe makes a small batch – enough for a bread loaf pan – but feel free to double and make in an 8×8 cake pan.

Ingredients:

Crust:

1/2 C raw almonds (no need to soak, unless you want to)
1/4 C raw walnuts (no need to soak, unless you want to)
3/4 C rolled oats
5 dates, pitted and roughly chopped
1/8-1/4 C coconut oil, melted [you can use less coconut oil and it’ll still come out nicely..if you need a little extra healthy fat in your diet, use the 1/4 C]
1/4 tsp salt

Filling:

12-14 dates, pitted and roughly chopped
1/4 C water

Instructions:

1. Crust: Place all crust ingredients (except the coconut oil) in a food processor. Blend until crumbly. Add melted coconut oil and blend until combined. This entire process does NOT take very long at all.

2. Remove 1/4 C of the crust and set aside. In a lined bread loaf pan (or if doubling, use an 8×8 cake pan lined with parchment), spread the crust evenly in the bottom. Place in fridge while you make the filling.

3. Filling: Place 12-14 pitted dates into a food processor. Begin to blend..and slowly add the water as you blend. Blend until preferred smoothness. Spread puree onto crust.

4. Topping: With remaining 1/4 C crust, add in a dash of ground clove and about 1/4 tsp cinnamon. Mix with a fork, then sprinkle on top of date puree.

5. Chill in fridge 1 hr (to overnight). Slice and enjoy!

Raw Date Bar

Happy Processing! 🙂

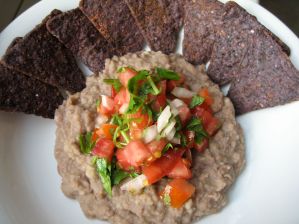
On this day in History: Refried Beans

//

Read Full Post »

I had dinner at a friends the other night, and of course.. I was the only vegan in attendance. Instead of making them find something vegan to make for me, I offered to bring something instead. Only having a short window of time between waking from my nap and when I was destined to arrive, I needed something quick and easy. So I ran to the grocery store, picked up the freshest looking veggies, some quinoa.. and threw this together. Luckily it was easy enough to remember without me having to write anything down. 🙂 This recipe literally took 15 minutes – while the quinoa was cooking, I prepped the veg..and by the time the quinoa was ready (12 minutes later), so was the veg! So if you’re looking for something quick, easy, crowd-pleasing, and crowd-filling.. this is your dish! There were 4 adults, and there’s enough left over to feed me for a few more meals… so it’s a perfect pot-luck dish to feed up to maybe 10 as a side, and maybe 4-5 hungry vegans as a main dish. But of course, you can easily double the recipe to feed a larger crowd.

Ingredients:

2 tsp canola, safflower or olive oil
1 C quinoa
2 C water
1 can or 1-1.5 C cooked black or pinto beans, rinsed and drained
sea salt and pepper to taste
2-3 tsp garlic powder
1-1.5 tsp ground cumin
1/2 tsp cardamom
1/2 bunch kale, chopped [it was about a handful of stems, maybe 8]
2 medium carrots, washed and chopped
6 Campari tomatoes, quartered (or 12 grape tomatoes, halved)
1/2 red bell pepper, 1” dice
1/2 yellow bell pepper, 1” dice **if you don’t want to use 1/2 of two different bells, you can use a whole of 1.. whatever tickles your bell pepper fancy!
1 bunch cilantro, minced
juice of 2 limes

Directions:

1. In a small saucepan, heat oil over medium heat. Add 1 C quinoa and toast lightly, about 2-3 minutes. Add water and spices, bring to a boil. Reduce heat and simmer for 12-15 minutes.
2. Meanwhile, prep (wash and chop) all the veg. Place all veg and half the cilantro into a large bowl, set aside. Juice the limes, set aside.
3. When the quinoa has maybe 3-4 minutes left, add the drained beans.
4. When all water is gone from the quinoa, remove from heat. Fluff with a fork. Toss onto veg, let sit a few minutes to “steam.”
5. Give a stir, drizzle with lime juice, add remaining cilantro. Salt and pepper to taste. Voilà!

Almost-Raw Veg & Quinoa Salad

Almost-Raw Veg & Quinoa Salad

**I call this almost-raw because the only thing cooked is the beans and quinoa. If you wanted it completely raw, omit the beans and sprout your quinoa.. it’ll take longer since the quinoa takes some time to soak and sprout, but it’s certainly doable.

Happy Chopping!

On this day in History: Chai Spice Shortbread Cookies (2009)

Read Full Post »

I’ve been interested in dabbling in raw food for some time now, but after spending a month eating a greater portion of raw food than normal I knew I had to get on it post-haste! For my birthday last week, I made these babies.. they’re mostly raw – and I say mostly because the Agave Nectar I had on hand was not raw, nor the tablespoon of maple syrup used in the tart crust… so almost raw. You can certainly adapt to a full raw version by using raw agave, subbing agave in the crust and using water in place of the coconut milk beverage in the cashew cream. But even though it was “almost raw” it was still super delicious, and doesn’t sit heavy like most baked treats. The recipe was adapted from Raw Food Real World. They used dehydrated cherries, but I like the fresh blueberries..but feel free to use whatever sturdy berry suites your fancy. Makes about 36-42 mini tartlets, or 1 standard size tart.

Ingredients:

For the tart crust:
3.5 C almond meal
3 TBSP date paste (I pureed about 6 Medjool dates – pitted – in the food processor before starting)
1 TBSP maple syrup
3/4 C coconut oil
large pinch of sea salt

For the almond-cashew cream:
1.75 C raw cashews, soaked for at least 2 hrs
1/4 C raw slivered almonds, soaked for at least 2 hrs
1 C coconut flakes/shredded coconut, or coconut meat
1/4 C coconut milk beverage (or water)
6 TBSP coconut oil
2 TBSP vanilla extract (or 1 TBSP + 1 tsp almond extract + 2 tsp vanilla extract)
pinch of sea salt

For the topping:
4 C fresh blueberries (~ 2 pints)
1/4 C agave nectar
1 tsp vanilla extract

Directions:

1. Place the cashews and almonds, for the cream, in a large bowl with enough water to cover. Set aside for at least 2 hrs. Place the blueberries in a bowl with the agave and vanilla. Stir to combine. Set aside until needed.
2. Tart Crust: In a food processor, mix together all the crust ingredients until thoroughly combined. Line individual mini tart shells (or one large tart shell) with plastic wrap. Divide the dough between the shells and press evenly into the sides and bottom – to create an even thickness throughout. Refrigerate until firm – at least 1 hour or more – and keep refrigerated until ready to fill. **Because I used mini tartlet shells..it took the time the nuts for the cream required to soak to complete this task. If you’re using a single standard tart shell, it would go much faster and you’d have some time to dawdle.

Almost Raw Fresh Berry Tart
3. Cashew-Almond cream: In a food processor or high speed blender, puree all the cream ingredients until completely smooth – stopping to scrape down the sides as needed. **If necessary, you can slowly increase the amount of coconut milk beverage to adjust consistency. Caution, if you add too much the cream will not stay firm in the tart shells..so better to err on the side of a thicker cream. 🙂
4. Fill each tart crust with the cream, creating a flat surface at the top. Cover and return to the refrigerator to chill and set – about 2 hours or more.

Almost Raw Fresh Berry Tart
5. Assembly: Remove the tarts from the fridge and the use the overhanging edges of the plastic wrap to carefully pull the tarts from their shells. If using a standard size tart shell, it should have a removable bottom from which you simply lift the tart out. Top each tart – or single tart – with the delicious soaked berries.

Almost Raw Fresh Berry Tart*Note: Keep covered in the fridge. These have kept in my fridge for at least 5 days, and are still tasty. Of course, the fresher the better.. but if they survive the hungry masses a few days, they’ll still be delicious.

Happy Unbaking! 😉

Read Full Post »

Another hiatus, for which I sincerely apologize! On the bright side our new yoga studio, Cherry Blossom Yoga, is doing really well..so there’s good reason for the hiatus. 🙂 And while I can’t promise when the next post will be, I can assure you that the inspiration that follows will be most pleasing to the palate. The ingredients are the same as the veggie sushi from days gone by. Though, I did add in some additional veg which you may like, that’s not normally found in traditional rolled veggie sushi. And with that in mind, any veg that you think you might enjoy raw would be a delightful addition! This dish feeds as many as you’d like..depending on how much rice you cook and veg you cut. But it makes a perfect, refreshing and raw (aside from toasting the nori), summertime salad chock full of vitamins (including B’s, thank you weed of the sea) and minerals without the need to roll sushi. 😉 This salad also gives you the freedom to include veg that may not be the easiest to get into a rolled sushi format. And if you can locate the right Shoyu or Tamari Sauce..a gluten- and/or wheat-free dish as well 😀

Ingredients:

Sushi Rice
Carrots, julienned
Cucumber, julienned
Fresh Red Bell Pepper, julienned
Green Onions, diced
Sliced Avocado (if one is so inclined, I’m not a fan..but Mother enjoyed it)
Raw Sesame Seeds
Pickled Ginger
Shoyu or Tamari soy Sauce (look for one that is wheat- and/or gluten-free if need be, regular soy sauce is NOT)
Toasted Nori, roughly chopped (not an easy task, but worth it..and by rough, I mean as good as you can get it.)

Directions:

1. Prepare the sushi rice.
2. While the rice is cooling off (I like to stick it in the freeze while chopping), roughly chop the toasted nori and place on serving plates (like the bed of a salad).
3. Julienne the carrots, cucumber, bell pepper; dice the green onions; set aside.
4. When the rice is cooled, wet hands and form a giant snowball of rice. Place ball o’ rice on top of chopped nori. Top with julienned veg and diced green onions. And if one is so inclined, top with pickled ginger, sliced avocado and sprinkle with sesame seeds and shoyu sauce. Utilize your awesome skills with chopsticks and ENJOY!

Happy Eating!

On This Day in History: Blueberry Bran Mini Loaves

Share

Veggie Sushi

Read Full Post »

Remember, the three key words for any slayer, and in this case detoxer, ‘preparation, preparation, preparation.’ Having a well mapped-out plan will make a detox go much smoother and more enjoyable. The upside, you get to eat as much as you can stand on days 1 and 2. This sounds great, in theory. By the end of day 1, you’ll be sick of the site of vegetables..and by the end of day 2, fruits will be your nemesis. But trust me, you will feel so good and clean come day 4 that’ll you be so happy you forced this minor disruption in your daily life. Planning ahead is a must! You want to be able to let your mind rest, so having a menu planned prior to starting will make things simpler. You want to plan to do this on a 4-day set, where day 3 will fall on a day you can relax and lounge around – no major activities, no stresses. I realize in this fast-paced, active world it’s hard to just take a day to relax. Again, trust me, your body and mind will thank you for a day off. Detoxing is about more than just eliminating toxins from the body; for me it’s also about eliminating toxic thoughts and feelings from yourself as well. Stress, including stressful thoughts and feelings, causes hormonal release that is antithetical to the cleansing process. Detoxing is dependent upon optimal function of the liver. You want to focus on positivity, thus allowing the liver to function to eliminate the toxins that have been stored deep in your cells, instead of fresh stressors and hormones being released during the detox caused by stressful and negative emotions.

Day 1: Veggies day – Raw or mostly raw…only lightly steamed (preferable) or cooked. The idea is to have as minimally cooked food as possible ingested. It’s okay to have an apple or a banana, but try to have only veggies. You’ll be able to have fruit on day 2, all you can stand..and believe me, by the end of the day you won’t want to see a vegetable and you’ll be thankful for fruit day. One would think that as a vegan, an all-veggie day would be easy and delicious. I do have to say, it’s harder than you’d think..so preparation will make it manageable. You must omit traditional vegan staple foods like beans, breads, grains, veggies that take extensive cooking like potatoes, as well as oils that you would normally cook them in. I like to make a big bowl of a raw vegetable medley – like a fruit salad, but with veggies. I like tomatoes, red and yellow bell pepper, baby spinach, fresh green beans, carrots, cucumbers, with some lightly steamed broccoli – but any veg you like raw (zucchini, or that can be steamed in under 5 minutes like the broccoli will be acceptable. I also carry around a bag of baby carrots for a quick and crunchy munchie. You can use spices like garlic, cayenne, etc..but try not to use to much salt, if any. If you need a cuppa, try to keep it caffeine-free, such as a rooibus or herbal tea. Also, try to drink tea that you don’t have to sweeten – or use a natural sweetener like stevia leaves or just a tiny bit of nectar. I don’t really eat a ‘breakfast’ on day 1, just have a cup of peppermint tea…then start in on eating the ‘veggie salad’ once I begin to feel hungry. **If you suffer from hypoglycemia, and are worried about having a crash on day 1, you can include a glass of juice among your beverages.

Day 2: Fruits Only – I find it easiest to make a giant fruit salad and eat on it all day. You can also have smoothies, as long as they are fruit only – no yogurt or other additives that you might normally include (wheatgerm, flaxseed, brewer’s yeast, etc). Again, if you need tea, keep it caffeine-free (rooibus, herbal).

Day 3: Fasting day – When you wake, have a cup of herbal tea and a glass of juice, not smoothie (orange and grapefruit, apple, whatever). Relax, take a nap, stay warm – no heavy activity. In the afternoon, have another cup of herbal tea (chamomile, peppermint, nettle, or sage). In the evening, have a cup of sleepy tea (valerian or chamomile) and another glass of juice. You may experience light headaches and/or light nausea on day 3 – that’s normal (a cup of thyme or peppermint tea will help with that). It’s just the toxins being released into circulation to be eliminated. The more toxins in your body, the worse these symptoms will be. If you eat more processed foods, meat, and/or dairy, or live in a more polluted environment – these things can create a greater storage of toxins in the body. Another thing you’ll notice as the toxins are released is the whitening of your tongue. Again, this is normal.

Day 4: Return to food – Upon waking, have a glass of juice or a smoothie. You want to start light, perhaps some toast or a piece of fruit. Then, for lunch, have something light like tomato or potato and/or butternut soup, even a brothy soup like vegetable noodle. You want to avoid heavy things like beans or sweets. You won’t be able to eat much for the next few days, and when you do eat you’ll notice that you want it to be something good for you. You’ll also notice that your portions will be smaller than normal. You’re going to feel so good, you’ll want to start doing this every spring like I do. You’ll be amazed at how aware you become of the things you eat, and the toxins we put in our bodies on a daily basis – even if you already consider yourself super healthy.

I suppose this goes without saying, but I suppose I should just to be thorough – DRINK TONS OF WATER DURING THE DETOX!

If you are on any medications for various health conditions, please consult a physician before commencing any type of detox or cleanse. This is not a way to lose weight, though you might see some water weight reduction afterwards. Please be smart when embarking on such an endeavor as a cleanse/detoxification.

Happy Detoxing!

Read Full Post »
Want a boost the health of your skin? Want to boost your energy? Well, this juice (adapted from The Big Book of Juices and Smoothies) will do both with two simple ingredients! Blueberries and Peaches!! Two of my favorite fruits combined into one yummy juice – of course, you could always opt for a nectarine in place of the peach if you’re not a peach fan…and still get all the goods for your energy level and skin appeal. This juice also helps with immunity and it gets a 1-star for digestion (on a scale of 5-star for skin and immunity). It’s also chock full of nutrients: beta-carotene, biotin, folic acid, vitamins B1, B2, B3, B6, C and E, calcium, chromium, iron, magnesium, manganese, phosphorous, potassium, sodium, and sulphur. Whew…that was a mouthful! You could also play around with different berries, such as straw or rasp! Even a blackberry would be good blended in. If you want a thicker, smoothie appeal – toss in a banana (frozen or room temp)! The recipe makes one 8oz drink, so feel free to double!

Ingredients:

1 peach or nectarine, pitted and chopped
1.5 (women-sized) handfuls of blueberries (or 1 man-sized)

Directions:

Blend together in a blender…strain if blueberry skins bother you, or not, whatever.

Happy Juicing!

Read Full Post »

I know that the kids of my generation will remember those Orange PushUps from the ice cream man, with the polka dotted cardboard and pushing up the sorbet before it could melt all over your hand from underneath! Ah, the good old days…summertime and sticky hands…ah! So what is an adult to do when you want to recapture a bit of youth – make orange sorbet with an optional shot of vodka! Ha ha! And best of all, I didn’t have to make any simple syrup since I used agave nectar!! This sorbet comes out so slushy good, you’ll wish you had a pushup container to eat it from!

Ingredients:

1.5 C fresh squeezed orange juice
1.5 C orange juice (prepackaged)
1 C agave nectar
1 TBSP vodka *optional

Directions:

Whisk together all ingredients and pour into an ice cream maker. Freeze according to manufacturer’s directions. Mine took about 25 minutes. Place in freezer-acceptable container, and freeze for about an hour before enjoying!!

Happy Freezing!

Read Full Post »

Here’s an alternate to Jo’s Cashew-Raspberry icing…Blueberry-Almond! I made the Basic Vanilla Cupcake with Lemony variation recipe from Vegan Cupcakes Take Over the World, but turned it into a mini-cake and slathered this luscious icing all over it. You know, a 12-cupcake recipe makes a perfect 3-layer mini-cake (and look how cute they are!). I also tend to like my icings a bit sweeter than Jo (of course it could’ve also been due to the almond meal addition that I needed more sweetness), so I increased the nectar to 1/2 C instead of 1/4 C. Adding the almond meal helped make the frosting a bit thicker than I imagine Jo’s was. Once it was chilled it was perfect – but I’m still gonna tinker to make it pipe-able.

Ingredients:

1 1/3 C raw slivered almonds
1/3 C almond meal
2 tsp almond extract
1 tsp vanilla extract
1/2 C raw agave
1 pint farmer’s market blueberries (about 1 2/3 C)

Directions:

1. Place almonds and almond meal in food processor. Blend until finely processed.

2. Add remaining ingredients. Blend until smooth and yummy.


3. Chill 20 minutes.
4. Ice cake with initial layer.


5. Chill cake and icing another 40 minutes before final frosting of cake. As you can see, in the pure sunlight, the frosting takes on a more blueish, less purple hue.


6. Refrigerate iced cake overnight – if you can make it that long.

*Of note: I don’t know why the cake came out so dense – it has never done that in cupcake form. Perhaps I should tinker with cooking temp and time (I of course cooked it longer, but still at 350), and when I poked it with a knife, it came out clean. But as you can see in the pic, the centers are pretty dense. Of course, it took on the consistency of a ‘half-baked’ variety. Perhaps there’s some future ice cream concoction brewing in my brain with this dense ‘half-baked’ appeal!

Happy Baking and Frosting!

Share

Read Full Post »

Hmm…chocolate cake. I use the recipe out of Vegan World Fusion Cuisine, which is simple and delicious. For the icing, I made up my own little concoction, with no sugar or “butter.” A food processor is a must for this icing, but it’s really easy, tasty and not over-the-top sweet. Of course, some people like their icing to be fluffy white clouds of sugar, so you could toss in a little powdered sugar if you want. I considered using almonds instead of cashews, and I bet hazelnuts would amazing. If anybody tries out other nuts or fruits, let me know how it turns out!

Ingredients:

1.5 C raw cashews

1 bag frozen raspberries (thawed)

0.25 C Agave nectar

1 tsp vanilla

Instructions:

Put nuts in food processor and blend for a couple of minutes, until pieces are very small. If raspberry seeds in your icing will bother you, press the berries through a fine mesh strainer to remove them. Add everything else to the nuts, and blend until smooth. Consistency is a crucial part of a good icing, so you may need a little more liquid (add a dash of hemp milk), or a little more firmness (add a pinch of corn starch or a spoonful of powdered sugar).

After your cake has cooled, spread this lovely icing over it and enjoy!

Share

Read Full Post »