Feeds:
Posts
Comments

Posts Tagged ‘Gluten-free adaptable’

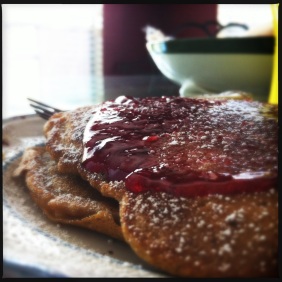
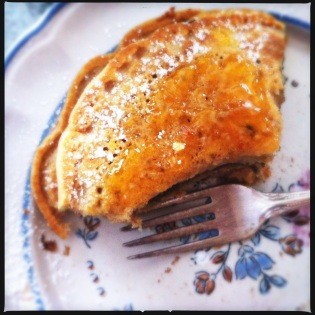
Basic Buttermilk PancakesAfter taking picture after picture of pancakes in various flavor permutations, i realized I didn’t have a basic buttermilk recipe on here! *GASP* So here it is.. a great morning breakfast, weekend brunch, or if you’re like me, a cozy dinner. 🙂 The other pancake recipes on the Primate are fluffier and more dense.. whereas these are little thinner and more moist. I like both styles.. some days I have a preference one way or the other. I’ll let you decide..

basic buttermilk pancakes

Ingredients:

2 C All-purpose flour

2 tsp baking powder
1 tsp baking soda
1/2 tsp salt
3 TBSP raw sugar (sucanat, turbinado, etc)
1/4 C canola or safflower oil
1/4 C hemp, almond or coconut milk
2-2.5 C hemp, almond or coconut milk + 1/4 tsp apple cider vinegar
4 TBSP Earth Balance Vegan Butter + more for greasing the skillet
2 tsp vanilla extract
Directions:
1. Heat a heavy skillet over medium heat. Proceed with mixing while the skillet gets good and hot.

2. In a measuring cup, mix 1/4 tsp ACV + 2.5 C vegan milk. Set aside to “buttermilk-ify.”

3. Melt 4 TBSP EBVB, set aside.
4. Whisk together the flour, baking powder, baking soda, salt, and sugar. [sidenote: If you want to add things like cinnamon or other spices.. now would be the time].
5. Add 1/4 C oil and 1/4 C milk to dry ingredients. [It’ll be kinda lumpy until you add more moisture].
6. Add 2 tsp vanilla extract and 2 C of the “buttermilk”.. determining if you need the last 1/2 C or not based on the consistency of your batter. The thicker the batter, the thicker/denser the pancake will be. The thinner the batter, the more slender the pancake will be. Again, this is a personal choice. You could even add up to 3 C milk for *really* thin pancakes.. I have never found the need.
7. Stir until just mixed ~ don’t overmix the batter.. a few lumps are okay.
8. Pour about 1/4 -1/3 C batter per pancake.. Once the cake starts popping bubbles or the sides are congealing.. it’s time to flip! Mine don’t take very long since they’re thinner. I barely have time to walk away from the stove. Probably about 2-3 min per side (depending on thickness).
9. Top with favorite jam, syrup, or powdered sugar. Enjoy!
basic buttermilk pancakes
Add-ins: fresh blueberries; spices like cinnamon, clove, or nutmeg; alternative extracts like almond or coffee.. so many variations can be created using this base recipe!
🙂
Happy Cooking!

Read Full Post »

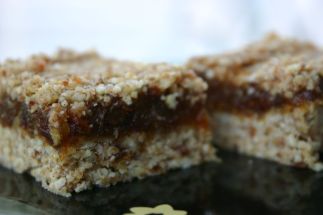
I fell in love with date bars last year in South Lake Tahoe.. So in love that I’ve carried around an ingredient list from a date bar that I ate in 2011, purchased at one of the cutest little hippie grocers (Grass Roots). And after a second venture to Lake Tahoe, and many a date bar from Grass Roots.. I came home and made my own! This recipe makes a small batch – enough for a bread loaf pan – but feel free to double and make in an 8×8 cake pan.

Ingredients:

Crust:

1/2 C raw almonds (no need to soak, unless you want to)
1/4 C raw walnuts (no need to soak, unless you want to)
3/4 C rolled oats
5 dates, pitted and roughly chopped
1/8-1/4 C coconut oil, melted [you can use less coconut oil and it’ll still come out nicely..if you need a little extra healthy fat in your diet, use the 1/4 C]
1/4 tsp salt

Filling:

12-14 dates, pitted and roughly chopped
1/4 C water

Instructions:

1. Crust: Place all crust ingredients (except the coconut oil) in a food processor. Blend until crumbly. Add melted coconut oil and blend until combined. This entire process does NOT take very long at all.

2. Remove 1/4 C of the crust and set aside. In a lined bread loaf pan (or if doubling, use an 8×8 cake pan lined with parchment), spread the crust evenly in the bottom. Place in fridge while you make the filling.

3. Filling: Place 12-14 pitted dates into a food processor. Begin to blend..and slowly add the water as you blend. Blend until preferred smoothness. Spread puree onto crust.

4. Topping: With remaining 1/4 C crust, add in a dash of ground clove and about 1/4 tsp cinnamon. Mix with a fork, then sprinkle on top of date puree.

5. Chill in fridge 1 hr (to overnight). Slice and enjoy!

Raw Date Bar

Happy Processing! 🙂

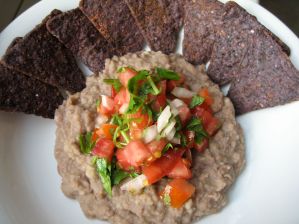
On this day in History: Refried Beans

//

Read Full Post »

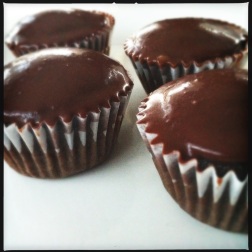
Double Dip Chocolate Cuppies“Did you just double-dip that cupcake?”

I did, Timmy.. I dipped, then I dipped AGAIN! I made the Redux: Red Velvet Cake cuppies (mini-sized), and then dipped into a chocolate glaze. When making the cuppies, fill the cups a little more than normal so they have a little peak over the edge of the cup. I let the cuppies and single dip chill in the fridge for about 10 min..then I dipped again! 🙂

Chocolate Glaze:
scant 1/3 C So Delicious Coconut Milk Beverage or other milk alternative
heaping 1/3 C chocolate chips (I used semi-sweet, but I bet a dark chip would also be nice. You could also chop up your favorite chocolate bar into 1/3 C.)

Heat milk over medium heat until steaming, but not simmering or boiling. Pour over chocolate and let sit a few moments (I hand-washed the pot that I steamed the milk in, then went to whisk). Whisk to create a glossy emulsion. Let chocolate cool on the counter about 10 min. If you’re in a colder ambient temperature location, it may not take as long. Once both cuppies and chocolate are cooled, dip cuppies in the chocolate gloss. Let chill in the fridge about 10 min, then dip again.. feel free to dip as many times as you like, letting them chill in the fridge between each dip. This recipe will make more than is needed for the cupcake recipe, so you can double the cupcake recipe..say for a potluck or party situation. And I’ve never heard of anyone complaining because there is extra chocolate glaze.. glaze pancakes, scones, or sundaes the next morning, or skip the middleman and just glaze your tongue. 😉

Happy Baking!

Double Dipped Chocolate CuppiesConfectioner’s note: If you want a sturdier chocolate – i.e. one that doesn’t soften at the touch – then simply melt the chocolate in a double-boiler and omit the milk step.

//

Read Full Post »

I made this recipe twice – the first time as a full cake for our Cherry Blossom Yoga vegan holiday potluck, the second time (after a little recipe tweaking) as mini-muffins for the Breakfast Yoga Club in The Woodlands. Both came out delicious, but I think after the recipe tweaking it’s now a supreme recipe! The original recipe was veganized from Food & Wine, plus I added in a Chai-spice upgrade. 😉 This recipe makes 1 10-inch crumb cake or 42-46 mini-muffins. Enjoy!

Ingredients:

Spiced Cake
2 TBSP ground flaxseed in 4 TBSP warm water
1/2 C almond or hemp milk + 1/4 tsp apple cider vinegar
2 C + 2 TBSP AP (sifted) or Cake flour
1 C turbinado/sucanat sugar (or 1/2 C granulated + 1/2 C brown sugar)
1 tsp baking powder
1 tsp baking soda
1 tsp mace
1/2 tsp each Cardamom, Cloves
1/4 tsp each Ginger, Allspice, Black pepper
1/2 tsp salt
1 tsp vanilla extract
1/2 C canola oil

Crumb Topping
3/4 C AP flour
1/4 + 1/8 C turbinado/sucanat sugar
1/4 tsp baking powder
pinch of salt
1/4 C canola oil

Directions:

1. Make the cake: Preheat oven to 350°F. In a small bowl, combine ground flax and water; set aside. In a small measuring cup, mix together the milk and apple cider vinegar; set aside.
2. In a large mixing bowl, combine dry ingredients and spices.
3. Add in canola oil, ground flax combo, milk mixture, and vanilla extract. Stir to combine; set aside.
4. Make the crumb topping: Whisk together all the dry ingredients. Pour in canola oil, and massage together with your fingers until it becomes crumb-like.
5. Spoon the batter (it’ll be a little thicker, not so much pourable as scoopable – like a really soft cookie dough) to a greased/floured 10′ springform pan or lined mini-muffin tin (about half-full each mini-muffin). Top with crumb topping.
6. Bake at 350°F for 40-45 min (for the full cake) or 12-14 min (for mini-muffins).

Happy baking!

On this day in History: Chai Granola

//

//

Read Full Post »

Red Velvet CupcakesThe first time I posted about Red Velvet Cuppies, I did mini’s and the frosting didn’t turn out as well as could be expected, so the post was lacking in standard Primate verve.. So here’s the redux post. This time I made full-size, since I didn’t have enough liners for minis.. and sometimes it doesn’t hurt to go standard-sizing – I’m just a gnome deep down, and love all things mini or gnome-size. 🙂 But who’s really going to turn down a cupcake, regardless of size.. honestly. This recipe makes 12 regulars, or about 24-32 minis. I old-school frosted with standard vegan Buttercream Frosting. Enjoy!

Ingredients:

Red Velvet Cuppies:

1 C hemp or almond milk
1 tsp apple cider vinegar
1/2 C turbinado sugar
1/3 C canola oil
1.5 tsp vanilla extract
1 C oat flour
1/4 C AP flour
1/3 C cocoa powder
3/4 tsp baking soda
1/2 tsp baking powder
1/4 tsp salt
red food coloring, as needed (or omit for a basic chocolate cupcake)

Buttercream Frosting: [this will make enough for piping the frosting, if frosting old-school style freehand..HALF the recipe]

1 C Earth Balance Vegan Butter, lightly softened
4.5-5 C sifted powdered sugar (I put in 3 C as the original recipe called for, but then added about 1.5-2 C more..didn’t measure it, but added until it was the right consistency)
2 TBSP Coconut Milk Beverage or Almond Milk
1 TBSP vanilla extract

Directions:

1. Preheat oven to 350°F. Line a 12-muffin tin with cupcake liners (or opt for minis). In a large measuring cup, combine milk and apple cider vinegar. Set aside.

2. In a mixing bowl, stir together sugar and oil. Pour into milk mixture. Set aside.

3. In same mixing bowl, sift (or whisk) together flours, cocoa powder, baking soda & powder, and salt. Add liquid mixture. Stir to combine. Add red food coloring to desired color.

4. Allocate around 1/4 C per cupcake for regulars (about 1 TBSP or so for minis). Bake at 350°F for 18-22 minutes for regulars, 12-15 minutes for minis.

5. Let cool while you make the UnButtercream Frosting in a stand mixer. Frost. Enjoy!

Red Velvet Cupcakes

Happy Baking!

On this day in History: New Years Eve @ 1323 Menu

//

Read Full Post »

Sesame Seed DressingThis dressing was created/inspired-by a beautiful and kind woman I met in Los Angeles, Tracy. She was kind enough to invite me into her home and share her dinner with me – of course, her friend that I was visiting was her equally generous and kind brother.. but nonetheless.. inviting anyone into your home and sharing something as special as a meal, let alone allowing me to assist in the preparation is indeed a generosity not to be taken lightly (at least in my eyes). She created this sesame seed dressing to top our salads – which were served alongside Basic Roasted Veg. She found the recipe through Bon Appetit..but in true awesome cooking fashion, we improved upon it! She didn’t have all the exact ingredients, so improvisation was required.. which I feel made it better than had we followed the recipe verbatim. In this version, I made a few additions myself..so here is the inspired recipe, with full credit going to Tracy for such inspiration! The recipe makes about 1/3 C of dressing.. and a little goes a long way! The salad in the photo filled a standard dinner plate.. I topped with 2 TBSP of dressing..and it was a bit overdressed for my liking. I tend to like a salad dressed as casual as I, not one that’s dressed to the nine’s. I hope you enjoy! I know I did…

Ingredients:

Dressing

2 tsp sesame seeds (a blend of black and white, or all white)

1 tsp whole coriander seeds

2 TBSP fresh lime juice (I used the juice of a small lime..which was a smidge or two more than 2 TBSP)

1/3 C extra-virgin olive oil

1/4 tsp toasted sesame oil *optional

1/2 tsp shoyu sauce

Salad

Raw Kale, washed and roughly chopped

Raw Red Leaf lettuce, washed and roughly chopped

Mixed Veg – julienned

*Carrots

*Red Bell Pepper

*Cucumber

Fresh green beans – ends trimmed

Fresh green onions

Fresh cilantro

4 TBSP dried golden raisins (per salad) soaked in some white wine

Directions:

Preparation

1. Place as many dried golden raisins as salads your planning on (4 TBSP per salad), cover with white wine. Let sit while you prepare the dressing.

2. In a saucepan over medium-low heat, lightly brown the sesame seeds and coriander seeds in a bit of the oil. It doesn’t matter how much..enough to saute – perhaps a couple TBSPs. Keep an eye on it… this can take a few minutes. While it was going, I was pulling the other veg, laying out my ingredients.

Sesame Seed Dressing3. Once seeds are lightly browned, pull off the heat. Set aside.

4. Julienne the bell pepper, carrots, cucumber, and any other veg that tickles your fancy. Trim the ends of the green beans. Toss all veg in a bowl, set aside.

Sesame Seed Dressing: Julienned Veg5. Chop the green onions and cilantro, set aside.

6. Roughly chop the kale and red leaf, and any other greens you may choose to use.

Sesame Seed Dressing: Salad Greens7. Whisk together remaining olive oil, sesame oil (if using), shoyu (if using), lime juice, and gently cooled oil/seeds mixture.

Sesame Seed Dressing

Assembly

8. You have two options here. (1) Plate out individual salads or (2) Toss all greens in a bowl to serve “family style.” **Note: If you serve family style, it should be served/eaten immediately. If you opt for choice 1, you have a little more flexibility with the left-overs.

9. If serving individually, top greens with mixed veg, green onions, and cilantro. Sprinkle about 3-4 TBSP soaked golden raisins around the edge of the salad. Drizzle about 1 TBSP dressing onto salad. You can add black pepper, but I wouldn’t recommend adding salt if you used the shoyu. If you’re opting for “family style,” add all greens, veg, and raisins to a bowl. Drizzle with a few TBSP dressing (more can always be added, but you can’t take away..once you hit black tie and stilettos, you can’t go back to jeans and flip-flops..at least when it comes to dressing a salad. 🙂 Serve up the tossed greens and veg, then sprinkle each with green onions, cilantro.

Mix Veg Salad with Sesame Seed Dressing

Other nice additions would be:
-Fresh arugula and/or baby spinach
-Other colored bell peppers
-Raw red onions, slivered
-Lightly roasted walnuts, pine nuts, or slivered almonds
-Dried cranberries
-Garbanzo or White Beans
-Apple, cubed

Happy Chopping!

On This Day In History: Green Tea-Ginger Sorbet

Read Full Post »

SunButter Cookie

Smiling cookie 🙂

They’re veritable kissing cousins, this sunbutter cookie and their nutty counterpart, the peanut butter cookie. The difference is the awesome nut-free goodness of SunButter. And if you use a gluten-free flour, these are gluten-free to boot! I used a 50/50 blend of buckwheat and all-purpose, so it’s possible to make these GF, just adjust the amount of flour to result in a sturdy enough consistency to resist spread during baking. They are flaky and delicate, moist and crumbly, and are perfect with a yummy cup of tea. These cookies are many things, insipid not being one of them. 😉 And is it just me..or does the cookie look like he’s laughing/smirking?

Ingredients:

8 oz (two sticks) Earth Balance Vegan Butter, room temperature
1/2 C turbinado sugar
1/3 C brown sugar
1/4 C mixture of almond milk and canola oil (approx a 50/50 ratio)
1 tsp vanilla extract
1 tsp almond extract
1 C chunky (or creamy) SunButter
1/4 tsp salt
1 tsp baking soda
2.5-2.75 C buckwheat (for gluten-free) or oat flour (*start with 2 C flour & add accordingly to make the dough the right consistency so as not to flatten out during baking – if you use regular AP flour, the 2 C should be fine..but you may need to add more)

Directions:

1. Cream the Earth Balance, SunButter and sugars until light. Add the almond/canola mix (or flaxseed mix), vanilla, and almond extracts. Blend together.
2. Add the salt, baking soda, and flour. Mix until well combined.
3. Preheat to 350°F. The dough can rest in fridge or on the counter.
4. Using a well-rounded teaspoon of dough for each cookie, drop the dough onto a cookie sheet. I used a small melon-baller to just scoop and drop..scoop and drop..very easy peasy!

SunButter Cookie
5. Bake 8-12 minutes, until the cookies are light golden brown. Cool on racks.

**Additionally, you could smother in some ganache for a more decadent treat..but these babies are delicious all on their own!


SunButter Cookie

Happy Baking!!

On This Day In History: Golden Delight (tea)

Read Full Post »

Another hiatus, for which I sincerely apologize! On the bright side our new yoga studio, Cherry Blossom Yoga, is doing really well..so there’s good reason for the hiatus. 🙂 And while I can’t promise when the next post will be, I can assure you that the inspiration that follows will be most pleasing to the palate. The ingredients are the same as the veggie sushi from days gone by. Though, I did add in some additional veg which you may like, that’s not normally found in traditional rolled veggie sushi. And with that in mind, any veg that you think you might enjoy raw would be a delightful addition! This dish feeds as many as you’d like..depending on how much rice you cook and veg you cut. But it makes a perfect, refreshing and raw (aside from toasting the nori), summertime salad chock full of vitamins (including B’s, thank you weed of the sea) and minerals without the need to roll sushi. 😉 This salad also gives you the freedom to include veg that may not be the easiest to get into a rolled sushi format. And if you can locate the right Shoyu or Tamari Sauce..a gluten- and/or wheat-free dish as well 😀

Ingredients:

Sushi Rice
Carrots, julienned
Cucumber, julienned
Fresh Red Bell Pepper, julienned
Green Onions, diced
Sliced Avocado (if one is so inclined, I’m not a fan..but Mother enjoyed it)
Raw Sesame Seeds
Pickled Ginger
Shoyu or Tamari soy Sauce (look for one that is wheat- and/or gluten-free if need be, regular soy sauce is NOT)
Toasted Nori, roughly chopped (not an easy task, but worth it..and by rough, I mean as good as you can get it.)

Directions:

1. Prepare the sushi rice.
2. While the rice is cooling off (I like to stick it in the freeze while chopping), roughly chop the toasted nori and place on serving plates (like the bed of a salad).
3. Julienne the carrots, cucumber, bell pepper; dice the green onions; set aside.
4. When the rice is cooled, wet hands and form a giant snowball of rice. Place ball o’ rice on top of chopped nori. Top with julienned veg and diced green onions. And if one is so inclined, top with pickled ginger, sliced avocado and sprinkle with sesame seeds and shoyu sauce. Utilize your awesome skills with chopsticks and ENJOY!

Happy Eating!

On This Day in History: Blueberry Bran Mini Loaves

Share

Veggie Sushi

Read Full Post »

I veganized this recipe from Kelly over at Evil Shenanigans – a fellow Foodbuzz foodie friend – and it is simply delicious! Jo gave us her classic blondies a few posts back, but this is for the peanut butter lovers in the casa! It has a very butterscotch loveliness about it, and you can’t beat that! I did make some minor changes to the original recipe, aside from the obvious veganizations – increasing the cinnamon, using brown rice syrup in place of golden/corn syrup, and using a blend of sugars in place of all brown. So here it is! Hope you enjoy it as much as I do!

Ingredients:

For the blondies:
1 C plus 2 TBSP all-purpose flour
1 1/4 tsp baking powder
1 tsp cinnamon
1/8 tsp salt
1/4 C packed brown sugar
1/2 C granulated sugar
1/3 C Earth Balance vegan butter, softened if mixing by hand
1 tsp vanilla extract
1/4 C canola oil/So Delicious coconut milk beverage (50:50 ratio)
1/2 C creamy peanut butter
1 TBSP brown rice syrup

For the frosting:
2 TBSP Earth Balance vegan butter, softened if mixing by hand
2 TBSP creamy peanut butter
1 C powdered sugar
1-2 TBSP So Delicious Coconut milk beverage

Directions:

1. Heat the oven to 350°F and line an 8×8 square cake pan with parchment.
2. In the bowl of an electric mixer fitted with a paddle, cream together the butter, brown sugar, granulated sugar, peanut butter, and brown rice syrup.  Add the canola/milk mixture and beat until well combined.

3. Sift together the flour, baking powder, cinnamon, and salt. Add to the creamed butter mixture, and beat until blended. The batter will be VERY thick – a spreadable consistency more than pourable.
4. Bake for 25-30 minutes, or until golden brown and puffed.  Remove from the oven and allow to cool completely.

5. For the frosting, add all ingredients to the bowl of an electric mixer. Beat until combined and fluffy-delicious. Spread onto cooled blondies. Cut, serve, and enjoy!

Happy Baking!

On Yesterday In History: Cranberry Sauce with dried cherries – perfect for the upcoming feasting 🙂


Read Full Post »

These delicious blondies are almost like chocolate chip cookie bars.  They are not too sweet, so they would be great with some coconut milk ice cream or a cup of hot cocoa. 🙂

Ingredients:

2 TBS flaxseed meal, soaked in 1/4 C warm water

2 sticks Earth Balance buttery sticks

1 C turbinado or demerara sugar

1 tsp vanilla extract

1/2 tsp almond extract

2 C AP flour, spooned into measuring cup and leveled off with a knife

1/2 C oat flour, spooned into measuring cup and leveled off with a knife

1/2 tsp salt

1/2 tsp baking soda

1 C chocolate chips, or chocolate bar cut in pieces

Instructions:

1.  Preheat oven to 350 degrees F.  Grease a 9×13 inch brownie pan and set aside.

2.  Cut the Earth Balance into pieces.  In a small sauce pan, melt the Earth Balance over low heat for 2 minutes, or until it has begun to melt, but there are still unmelted pieces.  Remove from heat.

3.  Whisk sugar into the Earth Balance.  Add vanilla and almond extra.  Set aside.

4.  In a large mixing bowl, stir together AP flour, oat flour, salt, and baking soda.

5.  Pour the Earth Balance and sugar, along with the soaking flaxseed meal into the dry ingredients.  Mix together.

6.  Spread the batter into the greased pan.  The texture of the batter is closer to cookie dough than brownie batter, so it won’t pour into the pan.  Instead, you need to press in evenly into the pan.

7.  Bake at 350 degrees for 30 minutes, or until the edges just begin to brown.

8.  Let cool on a rack for 10 minutes, then cut blondies and remove from pan.  If you leave them in the pan until it’s entirely cool, they will stick, so don’t forget to set a cooling timer!

Share

Read Full Post »

Older Posts »